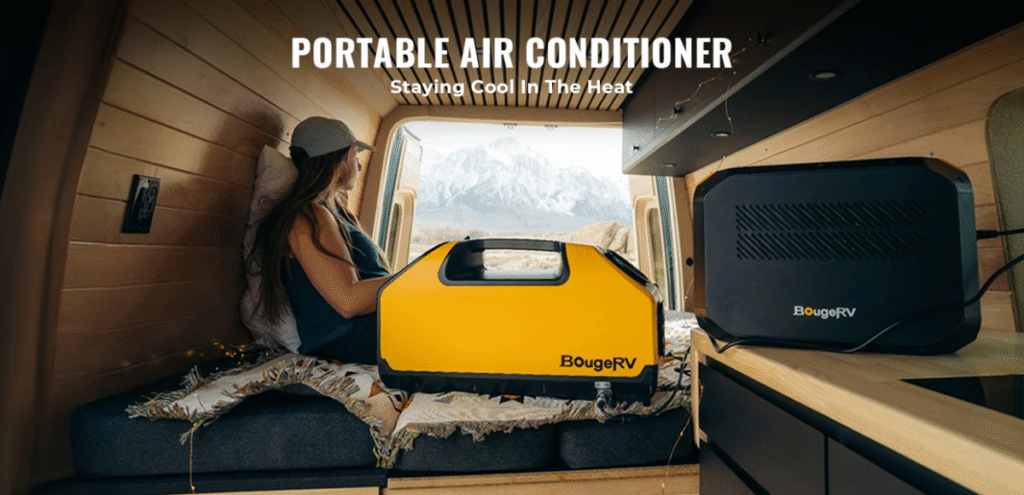
Living the RV lifestyle offers incredible freedom and adventure, but dealing with extreme temperatures can quickly turn your mobile home into an uncomfortable sweatbox. Whether you’re parked at a sunny campground or boondocking in the desert, maintaining a comfortable interior temperature is essential for enjoying your travels. A portable air conditioner in RV setups has become increasingly popular among RVers who want flexible, cost-effective cooling solutions that don’t require permanent installation or extensive modifications to their vehicle.
Unlike traditional rooftop RV air conditioners that require professional installation and can strain your electrical system, portable units offer versatility, ease of use, and the ability to move them between different spaces as needed. This comprehensive guide will walk you through everything you need to know about selecting, installing, and maintaining a portable AC unit for your recreational vehicle, ensuring you stay comfortable no matter where your adventures take you.
Why RVers Are Switching to Portable Air Conditioners
The traditional rooftop air conditioning units found in most RVs have served travelers well for decades, but they come with significant limitations that modern RVers are increasingly unwilling to accept. Portable air conditioners for RVs offer distinct advantages that make them worth serious consideration for anyone who spends extended time on the road. First and foremost, these units don’t require any permanent modifications to your RV’s structure, which is particularly important for those who lease their vehicles or want to maintain resale value. Installation typically takes less than an hour and requires no special tools or technical expertise, unlike rooftop units that demand professional installation costing hundreds or even thousands of dollars.
Portable units also provide targeted cooling, allowing you to cool specific areas of your RV rather than wasting energy on unoccupied spaces, which translates to lower power consumption and reduced strain on your generator or electrical hookup. Additionally, when one area is cool enough, you can simply move the unit to another location, giving you unprecedented control over your comfort level throughout the day.
The flexibility of portable AC units extends beyond just their physical mobility. Many RVers appreciate that these units can be easily removed and stored during cooler months, freeing up valuable floor space and reducing weight during travel. This is particularly beneficial for those who travel across different climate zones throughout the year.
RV portable air conditioning solutions also serve as excellent backup systems; if your primary rooftop unit fails during a trip, having a portable unit on hand can save your vacation from becoming a miserable experience. Furthermore, portable units typically cost significantly less upfront than installing a new rooftop system, with quality models ranging from $300 to $700 compared to $1,000 to $3,000 for rooftop installations. The lower power requirements of many portable units also mean they can run on smaller generators or even solar panel systems, making them ideal for boondockers and off-grid enthusiasts who want to minimize their reliance on campground hookups.
Understanding BTU Requirements for Your RV Space
Selecting the right cooling capacity for your portable air conditioner in RV applications requires understanding British Thermal Units (BTUs) and how they relate to your specific space. BTU measures the amount of heat an air conditioner can remove from a space per hour, and choosing the correct BTU rating is crucial for achieving optimal cooling performance without wasting energy or money. As a general rule, you need approximately 20 BTUs per square foot of space for typical cooling conditions, though this number can vary based on several factors including insulation quality, ceiling height, sun exposure, and climate.
For example, a small RV or trailer with 100-150 square feet of living space would require roughly 5,000-6,000 BTUs, while larger Class A motorhomes with 300-400 square feet might need 10,000-14,000 BTUs to maintain comfortable temperatures. However, RVs present unique challenges because they typically have poorer insulation than traditional homes, large windows that allow heat gain, and metal or fiberglass exteriors that absorb and radiate heat, meaning you might need to increase your BTU calculation by 10-20% compared to standard recommendations.
Several critical factors should influence your BTU selection beyond just square footage. The color of your RV’s exterior makes a surprising difference, with darker colors absorbing significantly more heat and potentially requiring an additional 10% cooling capacity. The number and size of windows in your RV directly impact heat gain, especially if they lack proper window treatments or UV-protective film. Your typical parking location matters immensely; if you frequently park in full sun without shade, you’ll need more cooling power than someone who primarily stays in shaded campgrounds.
The climate zone where you travel most often should also factor into your decision, as dry desert heat requires different considerations than humid coastal conditions. Your RV’s insulation quality varies dramatically between older and newer models, with modern RVs featuring better insulation that reduces cooling requirements. Finally, consider how many people typically occupy your RV, as each person generates approximately 400 BTUs of body heat per hour, and whether you use heat-generating appliances like ovens or stovetops frequently during hot weather.
Types of Portable Air Conditioners Suitable for RV Use
Not all portable air conditioners work equally well in RV applications, and understanding the different types available will help you make an informed decision for your specific needs. Single-hose portable air conditioners represent the most common and affordable option, featuring one exhaust hose that vents hot air outside while drawing replacement air from inside the RV. These units are compact, easy to install, and typically cost less than dual-hose models, making them attractive for budget-conscious RVers.
However, they create negative air pressure inside your RV by exhausting air outside, which can cause warm outside air to infiltrate through small gaps and reduce overall efficiency by up to 30% compared to dual-hose units. Despite this limitation, single-hose models work acceptably well for small to medium RVs, particularly when used in well-sealed spaces with minimal air leakage. Popular single-hose models suitable for RV use include units from brands like BLACK+DECKER, Honeywell, and Whynter, typically ranging from 8,000 to 12,000 BTUs.
Dual-hose portable air conditioners offer superior efficiency by using one hose to draw in outside air for cooling the condenser and a second hose to exhaust hot air, creating a balanced airflow that doesn’t generate negative pressure. These units cool spaces approximately 40% faster than single-hose models and maintain more consistent temperatures because they don’t pull warm air into your RV to replace exhausted air. While dual-hose units cost $100-$200 more than comparable single-hose models and take up slightly more space due to the additional hose, the improved efficiency often justifies the extra investment, especially for larger RVs or extreme climates. Brands like Whynter, Soleus Air, and Frigidaire manufacture reliable dual-hose units specifically suited for RV applications.
Evaporative coolers, also called swamp coolers, represent another option worth considering for RVers who primarily travel in dry climates. These units work by evaporating water to cool air, consuming significantly less electricity than traditional air conditioners and often running effectively on solar power. However, evaporative coolers only work well in low-humidity environments, becoming virtually useless in humid conditions where the air cannot absorb additional moisture. They also add humidity to your RV’s interior, which can be uncomfortable and potentially problematic for electronics and upholstery in enclosed spaces.
Essential Features to Look for When Shopping
When evaluating portable air conditioner in RV options, certain features significantly impact usability, efficiency, and long-term satisfaction. Energy efficiency should top your priority list, as RV electrical systems have limited capacity and many campgrounds impose strict amperage restrictions. Look for units with high Energy Efficiency Ratio (EER) ratings, which indicate how many BTUs of cooling the unit provides per watt of electricity consumed. Units with EER ratings of 10 or higher are considered efficient and will help you avoid tripping breakers or overloading your generator.
Many modern portable AC units feature eco-friendly refrigerants like R-410A or R-32 that provide better cooling performance while reducing environmental impact. Energy-saving modes automatically adjust compressor speed and fan settings based on current conditions, helping you conserve power during extended cooling sessions.
Noise level represents another crucial consideration, as RVs offer limited space and you’ll likely be sleeping just feet away from your portable air conditioner. Quiet operation becomes especially important during nighttime cooling when background noise can disrupt sleep quality. Look for units rated at 52 decibels or lower, which produce sound comparable to a quiet conversation or gentle rainfall. Some premium models feature special night modes that further reduce noise by slowing fan speeds and minimizing compressor cycling.
Programmable settings and smart controls add convenience by allowing you to set schedules, adjust temperatures remotely via smartphone apps, and create customized cooling patterns that match your daily routine. Units with built-in timers let you cool your RV before returning from activities, while sleep modes gradually adjust temperature throughout the night for optimal comfort. Digital displays with clear readouts make it easy to monitor and adjust settings even in dim lighting conditions common in RVs.
Dehumidification capacity matters significantly for RVers traveling in humid climates, as excess moisture can lead to mold growth, musty odors, and general discomfort. Quality portable AC units remove moisture from the air as a byproduct of the cooling process, with typical units extracting 40-80 pints of water per day. Look for models with easy-to-empty condensate tanks or continuous drain options that allow you to attach a hose for automatic water disposal. Auto-evaporation technology, found in some premium units, eliminates the need to manually empty water by evaporating most condensate and expelling it through the exhaust hose.
Multiple fan speeds and cooling modes provide flexibility for different situations, with high speeds for initial cooling and lower speeds for maintaining comfortable temperatures once reached. Some units offer dedicated fan-only modes that circulate air without cooling, useful for mild weather or improving air circulation in specific areas.
Installation Tips and Venting Solutions for RVs
Installing a portable air conditioner in RV requires creative problem-solving since these units are designed primarily for traditional homes with standard windows. The most critical aspect of installation involves properly venting the exhaust hose to release hot air outside while preventing warm air from entering your RV.
Window venting remains the most common approach, using the adjustable window kit included with most portable AC units. However, RV windows present unique challenges as they typically open differently than residential windows and may have screens, shades, or irregular shapes that complicate installation. For horizontal sliding RV windows, you can create a custom panel from plexiglass, foam board, or rigid insulation cut to fit your window opening, with a hole sized to accommodate the exhaust hose adapter.
Suggested read: Best AC Portable for Truck: Stay Cool on Every Road Trip in 2024
Secure the panel in the window track and seal any gaps with weatherstripping foam or duct tape to prevent air leakage. This approach works well but may require removing the panel when traveling or when you want to use the window, which can become tedious with frequent moves.
Roof vent installation offers a more permanent and aesthetically pleasing solution that leaves your windows available for ventilation and views. Many RVers route their portable AC exhaust hose through an existing roof vent opening, either replacing the standard vent cover with a modified version that accommodates the hose or creating a custom adapter plate. This method works particularly well if you have a spare roof vent or are willing to dedicate one vent exclusively to air conditioning. The upward exhaust direction naturally aids hot air expulsion and typically provides better clearance than window installations.
However, this approach requires weatherproofing to prevent leaks during rain and may necessitate custom fabrication skills to create proper adapters. Some RVers purchase aftermarket vent adapters specifically designed for portable AC hose connections, available from RV supply retailers and online marketplaces.
Door venting provides another alternative, especially for RVs with screen doors or entry doors you rarely use. You can create a door panel similar to the window approach, or even simpler, crack the door slightly and secure the exhaust hose in the opening with foam insulation or specially designed door vent kits. This method offers easy installation and removal but may compromise security if used on frequently accessed doors.
Regardless of which venting method you choose, proper insulation and sealing around the exhaust hose dramatically impacts cooling efficiency. Hot air leaking back into your RV forces the unit to work harder, consuming more power and struggling to maintain desired temperatures. Use foam weatherstripping, reflective insulation, or expanding foam to seal gaps around your venting setup.
Consider wrapping the exhaust hose itself with insulation sleeve material, as these hoses can become extremely hot and radiate heat back into your living space, partially defeating the cooling purpose. Keep the exhaust hose as short and straight as possible, as kinks, bends, and excessive length reduce airflow and force the compressor to work harder. Most manufacturers recommend limiting hose length to 5-6 feet maximum, though some units can tolerate slightly longer runs.
Position your portable air conditioner in RV spaces strategically to minimize hose length while ensuring adequate clearance around the unit for proper airflow. Leave at least 12-18 inches of clearance on all sides of the unit, particularly around air intake and exhaust areas where restrictions can significantly reduce performance.
Power Requirements and Electrical Considerations
Understanding the electrical demands of your portable air conditioner in RV is essential for safe operation and preventing frustrating power failures. Most portable AC units require standard 115-volt household current, which RV electrical systems provide through shore power connections, generators, or inverters.
However, the amperage draw varies significantly based on unit size and efficiency, with smaller 8,000 BTU units typically drawing 7-9 amps, medium 10,000 BTU units requiring 9-12 amps, and larger 14,000 BTU models consuming 12-15 amps. This becomes critical because RV electrical systems have limited capacity, with 30-amp service providing approximately 3,600 watts total and 50-amp service offering roughly 12,000 watts.
You must account for all appliances running simultaneously, as operating your air conditioner along with electric water heaters, microwaves, converters, and other devices can quickly exceed available capacity and trip breakers. Calculate your total amperage load by adding up all devices you plan to run together, ensuring you stay at least 20% below your system’s maximum capacity to provide a safety margin.
Starting surge requirements present an often-overlooked challenge that causes many RVers frustration when attempting to run portable air conditioners. When a compressor first starts, it draws 2-3 times its running amperage for several seconds, creating a power surge that can trip breakers even when your steady-state load is well within limits. For example, a portable AC unit that runs on 10 amps might require 25-30 amps during startup, potentially exceeding your RV’s 30-amp service capacity and causing immediate breaker trips.
To address this issue, consider purchasing a soft start device or look for portable AC units with built-in soft start technology that gradually ramps up compressor speed, reducing initial power draw by 50-65%. These devices cost $100-$300 but can make the difference between successfully running your air conditioner or constantly dealing with tripped breakers. Alternatively, ensure no other high-draw appliances operate when your AC unit starts up, turning off electric water heaters, converters set to charging mode, and other unnecessary devices during the initial 10-15 seconds of AC operation.
Generator compatibility becomes relevant for RVers who boondock or dry camp without shore power access. Running a portable air conditioner in RV setups from generator power requires careful matching of generator capacity to AC power requirements. As a general rule, you need a generator rated for at least 2,000 watts for small 8,000 BTU portable AC units, 2,500-3,000 watts for medium 10,000-12,000 BTU units, and 3,500-4,000 watts for larger models.
However, these figures account only for the air conditioner itself; add another 500-1,000 watts if you plan to run other appliances simultaneously. Inverter generators offer significant advantages for RV air conditioning applications, producing clean, stable power that protects sensitive electronics while running more quietly than conventional generators. Popular inverter generator models from Honda, Yamaha, Champion, and WEN provide sufficient power for most portable AC units while consuming less fuel and generating less noise than traditional generators. For extended boondocking, consider your fuel capacity and consumption rate, as running an air conditioner continuously can consume 0.5-1.5 gallons of gasoline per hour depending on generator size and load.
Optimizing Cooling Performance in Your RV
Simply installing a portable air conditioner in RV doesn’t guarantee optimal comfort; you must implement strategies that maximize cooling efficiency and minimize power consumption. Reducing heat gain should be your first priority, as every BTU of heat you prevent from entering your RV means less work for your air conditioner. Start by investing in quality reflective window covers or insulated curtains for all windows, particularly those facing direct sunlight. These barriers can reduce heat gain through windows by 60-80%, dramatically lowering the cooling load on your AC unit. Reflectix insulation, available at most RV supply stores, provides an affordable option that reflects radiant heat while allowing you to custom-cut pieces for any window size.
External window covers or awnings provide even better protection by blocking sunlight before it reaches your windows, preventing the greenhouse effect that occurs when heat gets trapped inside. Park strategically whenever possible, positioning your RV so windows face away from afternoon sun or take advantage of natural shade from trees, buildings, or terrain features.
Improving insulation and sealing air leaks significantly enhances cooling efficiency and reduces runtime. RVs, particularly older models, often have poor insulation and numerous air gaps that allow cooled air to escape and hot air to infiltrate. Conduct a thorough inspection of your RV on a sunny day, checking for light visible around windows, doors, roof vents, and pass-throughs. Apply weatherstripping to door frames and windows, use caulk or expanding foam to seal gaps around penetrations, and consider adding additional insulation to thin walls or ceilings if accessible. Pay special attention to slide-out seals, which commonly develop gaps that create substantial heat transfer.
Minimizing heat generation inside your RV helps your portable air conditioner in RV applications work more efficiently. Avoid using your oven or stovetop during hot weather, opting instead for outdoor grilling, microwave cooking, or cold meals. Incandescent light bulbs generate significant heat; replace them with LED alternatives that produce the same light with 75% less heat output. Run heat-generating appliances like clothes dryers, dishwashers, or showers during cooler morning or evening hours rather than peak afternoon heat.
Strategic air circulation improves comfort and cooling efficiency by eliminating hot spots and ensuring cool air reaches all areas of your RV. Position your portable AC unit to blow cool air toward the center of your living space rather than directly at walls or furniture that might block airflow. Use ceiling fans, if equipped, to help circulate cool air throughout the space, as moving air feels significantly cooler than still air at the same temperature.
Small USB-powered fans can direct cool air from your AC unit toward sleeping areas or workspaces where you spend the most time. Close doors to unused areas like bathrooms or bedrooms during peak heat to concentrate cooling in your primary living space, then redistribute cool air once temperatures drop.
Nighttime cooling strategies can dramatically reduce daytime cooling demands by taking advantage of cooler evening temperatures. Open windows and roof vents during cool nights to exhaust accumulated heat and bring in fresh air, then seal everything up in the morning before temperatures rise. Some RVers use whole-house fans or MaxxAir vent fans set to exhaust mode to rapidly cool their RV during evening hours, allowing them to run their AC less during expensive peak electricity times or conserve generator fuel.
Maintenance and Troubleshooting for Long-Term Performance
Proper maintenance ensures your portable air conditioner in RV continues operating efficiently throughout many camping seasons. Filter cleaning and replacement represents the single most important maintenance task, as dirty filters restrict airflow and force your unit to work harder while providing less cooling. Most portable AC units feature washable filters that should be cleaned every 2-4 weeks during regular use, more frequently in dusty environments or when running continuously.
Suggested read: Everstar Portable Air Conditioner: Your Complete Solution for Staying Cool Anywhere
Remove the filter according to manufacturer instructions, gently vacuum away loose debris, then wash with mild soap and warm water. Allow the filter to dry completely before reinstalling, as moisture can promote mold growth or damage the filter material. Some units use disposable filters that require periodic replacement, typically every 3-6 months depending on usage and conditions. Keeping filters clean can improve efficiency by 15-25%, reducing power consumption and extending compressor life while maintaining maximum cooling output.
Coil cleaning and maintenance keeps your unit operating at peak efficiency by ensuring proper heat transfer. The evaporator coils inside your unit and condenser coils near the exhaust need periodic cleaning to remove dust, pet hair, and debris that accumulate during operation. Most manufacturers recommend professional coil cleaning annually, but you can perform basic maintenance by carefully vacuuming accessible coil surfaces with a soft brush attachment. Avoid using sharp objects or high-pressure water that might damage delicate fins or coil surfaces. Check that drain lines remain clear and water flows freely from the condensate tank or drain hose, as blocked drains can cause water backup, overflow, and potential water damage to your RV.
Off-season storage protects your investment during months when cooling isn’t needed. Before storing your portable air conditioner in RV setups for winter, clean or replace filters, wipe down exterior surfaces, and run the unit in fan-only mode for several hours to dry internal components and prevent mold growth. Store the unit in a climate-controlled area if possible, protecting it from extreme temperatures, moisture, and rodent access. Keep the original packaging or use moving blankets to prevent cosmetic damage during transport and storage.
Common troubleshooting issues and solutions help you address problems without requiring professional service. If your unit isn’t cooling effectively, first check that the exhaust hose is properly connected and venting outside, as kinked or disconnected hoses cause immediate performance loss. Verify that filters are clean and airflow isn’t restricted by furniture or walls placed too close to the unit.
Ensure your selected temperature setting is lower than current room temperature, as units won’t activate cooling if the setpoint is already met. If your unit trips breakers repeatedly, you’re likely exceeding your electrical system’s capacity or experiencing voltage drops from inadequate wiring or generator capacity. Try running the AC alone without other high-draw appliances, or upgrade to a larger generator or 50-amp electrical service.
Water leakage typically indicates a full condensate tank, blocked drain line, or improper unit leveling. Empty the tank if applicable, clear any blockages from drain lines, and ensure your unit sits level with a slight backward tilt that directs water toward the drain. Strange noises like rattling or vibrating often result from loose panels, debris caught in fan blades, or improper installation on uneven surfaces. Tighten any loose screws, clear foreign objects, and place the unit on a stable, level surface with rubber pads to absorb vibrations.
Cost Analysis and Energy Consumption Comparison
Understanding the financial implications of operating a portable air conditioner in RV helps you make informed decisions about cooling strategies. Initial investment costs vary widely based on unit size, features, and brand reputation. Entry-level 8,000 BTU portable air conditioners suitable for small RVs typically cost $250-$350, offering basic cooling with minimal features. Mid-range 10,000-12,000 BTU units with programmable controls, remote operation, and better efficiency range from $350-$500, representing the sweet spot for most RVers seeking balanced performance and value.
Premium models featuring 14,000+ BTUs, dual-hose design, smart home integration, and ultra-quiet operation cost $500-$800 or more. When comparing costs, remember to account for installation accessories like window kits, vent adapters, extension hoses, and power management devices that can add $50-$150 to your total investment. While these upfront costs may seem significant, they’re substantially less than installing rooftop RV air conditioners that typically cost $800-$1,500 for the unit alone plus $200-$500 for professional installation.
Operating costs depend on your electricity source, runtime, and local utility rates. When connected to shore power at campgrounds, electricity typically costs $0.10-$0.15 per kilowatt-hour, though some premium resorts charge up to $0.25 per kWh. A 10,000 BTU portable AC unit drawing 900 watts consumes 0.9 kWh per hour of operation, costing approximately $0.09-$0.14 per hour at typical rates. Running the unit 8 hours daily adds roughly $0.72-$1.12 to daily campground fees, or $21.60-$33.60 monthly.
For generator operation, fuel costs dominate the equation. A 2,000-watt inverter generator running at 50% load consumes approximately 0.5-0.7 gallons of gasoline per hour, costing $1.50-$2.80 per hour at $4 per gallon gas prices. This translates to $12-$22.40 for 8 hours of cooling, or $360-$672 monthly for generator-powered air conditioning. These significant differences make shore power connections far more economical than generator operation for extended cooling needs, though generators provide essential backup capability for boondocking situations.
| Cooling Method | Initial Cost | Hourly Operating Cost (Shore Power) | Hourly Operating Cost (Generator) | Monthly Cost (8hrs/day) |
|---|---|---|---|---|
| Portable AC 8,000 BTU | $250-$350 | $0.07-$0.11 | $1.20-$2.40 | $16.80-$67.20 |
| Portable AC 10,000 BTU | $350-$500 | $0.09-$0.14 | $1.50-$2.80 | $21.60-$78.40 |
| Portable AC 14,000 BTU | $500-$800 | $0.13-$0.20 | $2.00-$3.50 | $31.20-$98.00 |
| Rooftop RV AC Unit | $1,000-$2,000 | $0.11-$0.17 | $1.80-$3.20 | $26.40-$89.60 |
Comparative efficiency analysis reveals that while rooftop units might seem more powerful, properly sized portable air conditioners often provide similar or better efficiency for targeted cooling. Rooftop units cool entire RVs regardless of occupied space, wasting energy on unused bedrooms or bathrooms. Portable air conditioner in RV configurations allow zone cooling, concentrating cold air where you actually spend time and potentially reducing overall energy consumption by 30-40%.
The flexibility to turn off the unit when leaving your RV or during cooler periods further reduces costs compared to built-in systems that many RVers leave running continuously. Over a typical five-year ownership period, a portable AC unit’s lower initial cost and flexible usage patterns often result in lower total cost of ownership compared to rooftop installations, even accounting for slightly higher per-BTU operating costs for some models.
Real-World Case Studies from RV Enthusiasts
Understanding how other RVers successfully implement portable air conditioner in RV systems provides valuable insights and practical guidance.
Case Study 1: Full-Time Family in a Class C Motorhome – The Martinez family travels full-time in their 24-foot Class C motorhome with their two children. Initially relying on their factory rooftop AC unit, they struggled with high campground electricity costs and insufficient cooling during summer visits to Arizona and Texas. After researching alternatives, they purchased a dual-hose 12,000 BTU portable air conditioner for $450 and installed it using a custom plexiglass window panel.
By positioning the unit to cool their main living area during the day and moving it to the bedroom at night, they reduced their cooling costs by approximately 35% compared to running the rooftop unit. The family particularly appreciates the ability to move the unit between spaces and the fact that it runs quietly enough not to disturb the children’s sleep. Their main challenge involved finding adequate storage space for the unit during travel, which they solved by creating a custom platform in their rear storage compartment secured with ratchet straps.
Case Study 2: Boondocking Solo Traveler with Solar Power – James, a retiree traveling solo in a 19-foot travel trailer, wanted to maintain cooling capability while boondocking on Bureau of Land Management land without generator noise. He installed a 1,200-watt solar panel array with lithium batteries providing 400 amp-hours of storage capacity, paired with an 8,000 BTU portable air conditioner modified with a soft start device. By implementing aggressive heat reduction strategies including reflective window covers, LED lighting, and outdoor cooking,
James successfully runs his portable air conditioner in RV setup for 4-6 hours daily on solar power alone. He operates the AC during peak afternoon heat from 2-6 PM when solar production remains high, then relies on evening ventilation and battery-powered fans overnight. His system cost approximately $3,500 total for solar equipment plus $320 for the portable AC unit, but provides completely off-grid cooling capability that has transformed his boondocking experience and eliminated fuel costs for generator operation.
Case Study 3: Weekend Warriors with Limited Budget – Sarah and Mike use their 28-foot fifth wheel primarily for weekend trips and occasional week-long vacations during summer. When their rooftop AC unit failed, they faced a $1,800 repair quote that seemed excessive given their limited usage. Instead, they purchased a single-hose 10,000 BTU portable unit for $380 and vented it through a spare roof vent using a $45 adapter kit. Their installation took approximately two hours and required only basic hand tools. Over two summers of weekend use, they’ve experienced completely adequate cooling for their needs while saving nearly $1,400 compared to the rooftop repair.
They appreciate that the portable unit can be easily removed and stored in their garage during winter, protecting it from potential freeze damage that affected their original rooftop unit. The only downside they’ve encountered is slightly reduced cooling during extremely hot weather above 100°F, which they mitigate by parking in shade and using their awning to block afternoon sun.
Top Portable Air Conditioner Models for RV Use in 2024
Selecting from the hundreds of portable air conditioner in RV compatible models on the market can be overwhelming, so we’ve compiled detailed reviews of top-performing units specifically suitable for recreational vehicles. BLACK+DECKER BPACT14WT – This 14,000 BTU dual-hose portable air conditioner represents an excellent choice for larger RVs and extreme climates. With cooling capacity sufficient for spaces up to 350 square feet, it handles Class A motorhomes and spacious fifth wheels effectively. The dual-hose design provides 40% better efficiency than single-hose competitors, cooling spaces noticeably faster while consuming less power. Its 24-hour programmable timer, sleep mode, and three fan speeds offer flexibility for different situations. At 53 decibels, it runs reasonably quietly though not whisper-silent.
The unit includes a full window kit with adjustable panels, drain hose, and remote control. Priced around $550-$600, it represents solid mid-range value with 4.2/5 average customer ratings. The main drawback involves its 80-pound weight and larger footprint compared to smaller units, requiring adequate floor space and making it challenging to move frequently.
Whynter ARC-14S – This 14,000 BTU dual-hose unit has earned a devoted following among RVers for its superior build quality and efficient performance. The Whynter features auto-drain technology that recycles condensate to cool the condenser coils, minimizing or eliminating the need to empty water tanks manually. Its activated carbon air filter removes odors and improves air quality, particularly valuable in the confined space of an RV. The unit operates at 52 decibels on low setting, making it one of the quieter options available. With three operational modes including air conditioner, fan, and dehumidifier, plus programmable thermostat and 24-hour timer, it offers comprehensive climate control.
The portable air conditioner in RV applications benefits from its environmentally friendly R-410A refrigerant and impressive 11.2 EER rating. Priced around $500-$550, it costs less than comparable units while offering superior performance. Customer reviews average 4.4/5 stars, with RVers praising its reliability and quiet operation. The 80-pound weight and need for two installation hoses represent the primary downsides.
Suggested read: RV Portable Waste Tanks: Best Options, Sizes & How to Use Them
Frigidaire FHPH132AB1 – For RVers seeking budget-friendly cooling for small to medium spaces, this 13,000 BTU single-hose unit delivers impressive value at $400-$450. Despite its lower price point, the Frigidaire includes desirable features like effortless restart that automatically resumes operation at previous settings after power interruptions, particularly useful when dealing with intermittent campground power or generator use. The unit’s dehumidification capacity of 71 pints per day makes it excellent for humid climates where moisture control equals cooling in importance.
Its relatively lightweight 80-pound design and included caster wheels facilitate movement between rooms. The unit runs at 53 decibels, acceptable though not exceptionally quiet. With spaces up to 450 square feet cooling capacity, it handles most RV applications capably. Customer satisfaction averages 4.1/5 stars, with particular praise for reliability and value. The single-hose design creates slight negative pressure and reduces efficiency compared to dual-hose alternatives, but the significant cost savings justify this trade-off for many budget-conscious RVers.
hOmeLabs 10,000 BTU – This popular 10,000 BTU single-hose unit offers the best combination of price and performance for small to medium RVs at just $320-$370. Its compact footprint and 61-pound weight make it the most portable option reviewed here, easily moved by one person and requiring minimal floor space. The unit includes sleep mode that gradually adjusts temperature throughout the night, reducing power consumption while maintaining comfort. Its 24-hour timer and three fan speeds provide adequate control for most situations.
The 52-decibel operation makes it one of the quieter budget options available. With 300 square feet cooling capacity, it suits smaller Class B campervans, truck campers, and compact travel trailers perfectly. The dehumidification rate of 55 pints daily handles moisture effectively in humid climates. Customer reviews average 4.0/5 stars, noting excellent value though not matching premium units’ refinement. The lower BTU capacity limits effectiveness in larger spaces or extreme heat, so proper sizing remains critical when considering this model for your portable air conditioner in RV needs.
Alternatives and Complementary Cooling Strategies
While portable air conditioner in RV units provide effective primary cooling, understanding alternative and complementary cooling methods helps you maintain comfort while optimizing energy usage and costs. Roof vent fans represent the most cost-effective supplementary cooling investment, with quality units like MaxxAir or Fantastic Fan costing $150-$300 but dramatically improving ventilation and cooling efficiency. These fans exhaust hot air accumulated near your RV’s ceiling, where temperatures can be 10-15 degrees higher than floor level, creating negative pressure that draws cool outside air through windows.
Running roof vent fans during cooler morning and evening hours can maintain comfortable temperatures without air conditioning, while using them in conjunction with your portable AC during hot weather improves cooling distribution and allows you to run the AC at lower speeds or higher temperature settings, reducing power consumption by 20-30%. Many modern roof vent fans include rain sensors that automatically close covers during precipitation and remote controls for convenient operation.
Reflective barriers and insulation upgrades provide permanent improvements that reduce cooling loads regardless of your chosen cooling method. Installing reflective radiant barriers in your RV’s ceiling, particularly above slide-outs where insulation is typically minimal, can reduce heat gain by 30-40%. These barriers cost $50-$150 for materials and can be installed DIY with basic tools and adhesive.
Upgrading window treatments from basic RV blinds to insulated cellular shades provides dual benefits of blocking heat during summer and retaining warmth during winter. Quality cellular shades designed for RV windows cost $30-$60 per window but dramatically reduce heat transfer through these vulnerable areas. External window awnings or shutters provide even better protection by blocking sun before it reaches windows, though they cost more and require careful installation to avoid damage during travel. For adventurous RVers, spray foam insulation applied to accessible wall and ceiling cavities permanently improves thermal performance, though this modification requires commitment and potentially affects resale value.
Portable evaporative coolers serve as energy-efficient alternatives to air conditioners in dry climates, consuming 75% less electricity while providing effective cooling through water evaporation. Quality swamp coolers designed for RV use cost $100-$300, run on standard 115-volt power drawing only 2-3 amps, and can even operate on solar panel systems without large battery banks. These units work fantastically in desert environments with humidity below 30%, providing comparable comfort to air conditioning while using a fraction of the power.
However, their effectiveness drops dramatically as humidity rises, becoming virtually useless above 60% humidity. They also add moisture to your RV’s interior, which can be problematic for electronics, bedding, and upholstery if used extensively. Portable air conditioner in RV setups combined with strategic use of complementary cooling methods often provides the best overall solution, allowing you to maintain comfort while minimizing energy consumption and costs.
For those interested in other portable solutions for outdoor living, check out this guide to portable batting cages for improving your recreational activities.
Frequently Asked Questions About Portable Air Conditioners in RVs
Q: Can a portable air conditioner cool an entire RV effectively?
A: Whether a portable air conditioner can cool an entire RV depends on several factors including RV size, unit BTU capacity, insulation quality, and climate conditions. For small RVs under 200 square feet like Class B campervans or truck campers, a properly sized 8,000-10,000 BTU portable unit can effectively cool the entire space. Medium RVs up to 300 square feet including Class C motorhomes and small travel trailers typically require 10,000-14,000 BTU units for whole-space cooling.
Large Class A motorhomes and spacious fifth wheels often exceed the practical cooling capacity of single portable units, though strategically positioned 14,000 BTU models can maintain comfortable temperatures in primary living areas. For best results, implement heat reduction strategies including window covers, proper parking orientation, and sealing air leaks that significantly improve cooling effectiveness regardless of unit size.
Q: How much power does a portable air conditioner draw in an RV?
A: Power consumption for portable air conditioner in RV applications varies based on unit size and efficiency ratings. Small 8,000 BTU units typically draw 7-9 amps (700-900 watts), medium 10,000 BTU models require 9-12 amps (900-1,200 watts), and larger 14,000 BTU units consume 12-15 amps (1,200-1,500 watts) during normal operation.
However, starting surge draws 2-3 times running amperage for 5-15 seconds when the compressor initially engages, potentially requiring 25-30 amps momentarily. This surge often causes breaker trips on 30-amp RV electrical systems if other appliances operate simultaneously. Using soft start devices reduces surge requirements by 50-65%, making portable AC operation more reliable on limited electrical systems. Most portable AC units require dedicated 20-amp circuits for safe operation, though they technically plug into standard 15-amp outlets.
Q: Can I run a portable air conditioner on solar power?
A: Running a portable air conditioner in RV setups on solar power is technically possible but requires substantial investment in solar panels and battery storage. A typical 10,000 BTU portable AC drawing 1,000 watts (approximately 83 amps at 12 volts after inverter losses) consumes 83 amp-hours per hour of operation. To run this unit for 6 hours requires 500 amp-hours of battery capacity (accounting for recommended 50% depth of discharge on lead-acid batteries or deeper discharge on lithium systems). You’ll need 800-1,200 watts of solar panels to replenish this energy, plus a 2,000+ watt inverter to convert DC battery power to AC. Total system costs typically exceed $4,000-$6,000 for adequate solar cooling capability.
However, efficient 8,000 BTU units combined with aggressive heat reduction strategies, running during peak solar production hours only, and accepting partial rather than continuous cooling can work with smaller 600-800 watt solar arrays and 300-400 amp-hour lithium battery banks costing $2,500-$3,500.
Q: What’s the difference between single-hose and dual-hose portable air conditioners for RVs?
A: Single-hose portable air conditioners use one hose to exhaust hot air outside while drawing replacement air from inside your RV, creating negative pressure that can reduce efficiency by 30% as warm outside air infiltrates through gaps. These units cost less, typically $50-$150 cheaper than comparable dual-hose models, and require simpler installation with just one hose to route outside. Dual-hose units use separate hoses for intake and exhaust, drawing outside air to cool the condenser and exhausting hot air through the second hose without creating negative pressure.
Suggested read: Commercial Portable Air Conditioner: The Best Cooling Solutions for Your Business in 2026
This design cools spaces 40% faster and maintains more consistent temperatures, though the units cost more and occupy slightly more floor space due to dual hoses. For small, well-sealed RVs, single-hose units work adequately, while larger RVs or those with air leakage issues benefit significantly from dual-hose efficiency despite higher costs.
Q: How do I prevent my portable air conditioner from tripping my RV’s circuit breaker?
A: Breaker trips when running portable air conditioner in RV electrical systems typically result from exceeding available amperage capacity, particularly during compressor startup surge. To prevent trips, first verify your RV’s electrical capacity (30-amp or 50-amp service) and calculate total load including all operating appliances. Turn off high-draw devices like electric water heaters, converters in charging mode, microwaves, and hair dryers before starting your AC unit. Install a soft start device or purchase an AC unit with built-in soft start technology reducing surge requirements by 50-65%. Ensure your AC unit plugs into a dedicated circuit not shared with other appliances.
Check campground power quality using a multimeter or electrical management system, as low voltage (below 108 volts) forces AC units to draw higher amperage, increasing trip likelihood. Consider upgrading to 50-amp RV electrical service if frequently experiencing power limitations with 30-amp systems.
Q: How often should I clean or replace the filter in my portable air conditioner?
A: Filter maintenance directly impacts cooling efficiency and air quality for portable air conditioner in RV applications. Clean washable filters every 2-4 weeks during regular use, more frequently in dusty environments, during high pollen seasons, or when traveling on dirt roads. Remove the filter according to manufacturer instructions, vacuum loose debris, wash with mild soap and warm water, rinse thoroughly, and allow complete drying before reinstalling. Disposable filters require replacement every 3-6 months depending on usage intensity and environmental conditions.
Signs indicating immediate filter attention includes reduced airflow, weaker cooling performance, ice formation on coils, increased noise levels, or visible dust accumulation on the filter surface. Running portable AC units with dirty filters can reduce efficiency by 15-25%, increase energy consumption, strain the compressor leading to premature failure, and circulate allergens and contaminants throughout your RV’s confined space.
Q: Can I use a portable air conditioner while driving my RV?
A: Operating a portable air conditioner in RV while driving is generally not recommended due to safety concerns and practical limitations. Most portable AC units are not designed for operation during vehicle movement and could tip over, shift position, or sustain damage from road vibrations without proper securing. The exhaust hose installation, whether through windows or roof vents, typically prevents windows from closing completely, creating safety hazards and potential damage during travel. Power requirements present another challenge, as portable AC units cannot run on 12-volt DC systems directly and require 115-volt AC power from inverters connected to your house battery bank, which quickly depletes batteries if your alternator cannot provide sufficient charging current during travel.
Most RVers rely on dashboard air conditioning during travel, then set up their portable AC units upon arrival at campsites. If you absolutely must run AC while stationary during rest stops, ensure the unit is properly secured, connected to adequate power through an inverter or generator, and monitored constantly during operation.
Final Recommendations and Where to Buy
Selecting the right portable air conditioner in RV for your specific needs requires balancing cooling capacity, energy efficiency, budget constraints, and personal preferences about features and noise levels. For small RVs and campervans under 200 square feet, we recommend 8,000-10,000 BTU single-hose units offering adequate cooling at lower costs and reduced power consumption compatible with smaller electrical systems and generators.
The hOmeLabs 10,000 BTU model provides excellent value in this category, delivering reliable cooling for $320-$370 with energy-efficient operation and compact footprint ideal for limited spaces.
Medium RVs and travel trailers between 200-300 square feet benefit most from 10,000-12,000 BTU dual-hose models that provide faster cooling and better efficiency justified by their moderate price premium. The Whynter ARC-14S represents our top pick for this category, combining superior build quality, auto-drain convenience, and quiet operation that RVers consistently praise despite its $500-$550 price point.
Large RVs and Class A motorhomes exceeding 300 square feet require maximum cooling capacity available in portable form factors, making 14,000 BTU dual-hose units the preferred choice despite higher costs and power requirements. The BLACK+DECKER BPACT14WT delivers exceptional cooling capacity for larger spaces, backed by dual-hose efficiency and comprehensive features at competitive $550-$600 pricing.
Budget-conscious RVers who prioritize value over premium features should consider the Frigidaire FHPH132AB1, offering impressive 13,000 BTU cooling capacity at just $400-$450 with reliability that justifies minor efficiency trade-offs compared to premium models. Regardless of which model you choose, remember that proper installation with effective venting and heat reduction strategies impacts performance as significantly as unit selection, often making an adequately sized mid-range unit in a well-prepared RV outperform a premium model in a poorly insulated space.
When you’re ready to purchase your portable air conditioner in RV setup, several reputable retailers offer competitive pricing and reliable service. Amazon provides the largest selection with user reviews helping inform decisions, competitive pricing, and convenient delivery to home addresses or Amazon Lockers near your travel route. Prime membership offers free shipping and extended return windows beneficial when ordering large items like portable AC units.
Home Depot and Lowe’s stock major portable AC brands with the advantage of in-store inspection before purchase, though selection may be limited compared to online retailers. Their price-matching policies ensure competitive pricing, and local availability allows same-day purchase for urgent cooling needs. RV-specific retailers like Camping World and PPL Motor Homes sometimes carry portable AC units alongside traditional RV air conditioners, with staff knowledgeable about RV-specific installation challenges and electrical considerations. Manufacturer websites occasionally offer direct purchase options with manufacturer warranties and occasional promotional pricing or bundle deals including extended warranties or accessory packages.
Start enjoying comfortable RV travel regardless of weather by investing in a quality portable air conditioner in RV today! Whether you’re planning extended summer trips, moving to full-time RV living, or simply want backup cooling capability, the flexibility and cost-effectiveness of portable AC units make them excellent additions to any recreational vehicle.
With proper selection based on your RV size and cooling needs, correct installation following the guidance provided in this comprehensive guide, and regular maintenance ensuring long-term performance, your portable air conditioner will provide years of reliable cooling comfort on all your adventures. Don’t let extreme heat limit your travel destinations or compromise your comfort – take control of your RV’s climate and extend your camping season with a carefully chosen portable cooling solution that meets your specific requirements and budget.
Sources and Additional Resources
For more information about portable air conditioner in RV applications and related topics, consult these authoritative resources:
- Energy Star provides comprehensive guidance on air conditioner efficiency ratings, helping consumers choose energy-efficient models that reduce operating costs and environmental impact (https://www.energystar.gov)
- RV forums including iRV2.com and RV.net host active communities where experienced RVers share real-world experiences, installation tips, and product recommendations specific to RV cooling challenges
- Consumer Reports publishes detailed portable air conditioner testing results and comparisons, evaluating cooling performance, energy efficiency, and reliability across multiple brands and models (https://www.consumerreports.org)
- Manufacturer websites for BLACK+DECKER, Whynter, Frigidaire, and other leading brands provide detailed specifications, installation guides, and troubleshooting resources specific to their portable AC models
- YouTube channels dedicated to RV living and maintenance offer video tutorials demonstrating installation techniques, venting solutions, and optimization strategies for portable AC units in various RV configurations
Citation: Information about BTU requirements, energy efficiency ratings, and cooling capacity calculations based on industry standards published by the Air Conditioning, Heating, and Refrigeration Institute (AHRI) and Department of Energy guidelines for residential and portable air conditioning systems.
Ready to upgrade your RV cooling system? Explore the latest portable air conditioner options specifically designed for RV applications and start planning your installation today. Visit The Portable Shop for additional portable solutions that enhance your RV lifestyle and outdoor adventures.