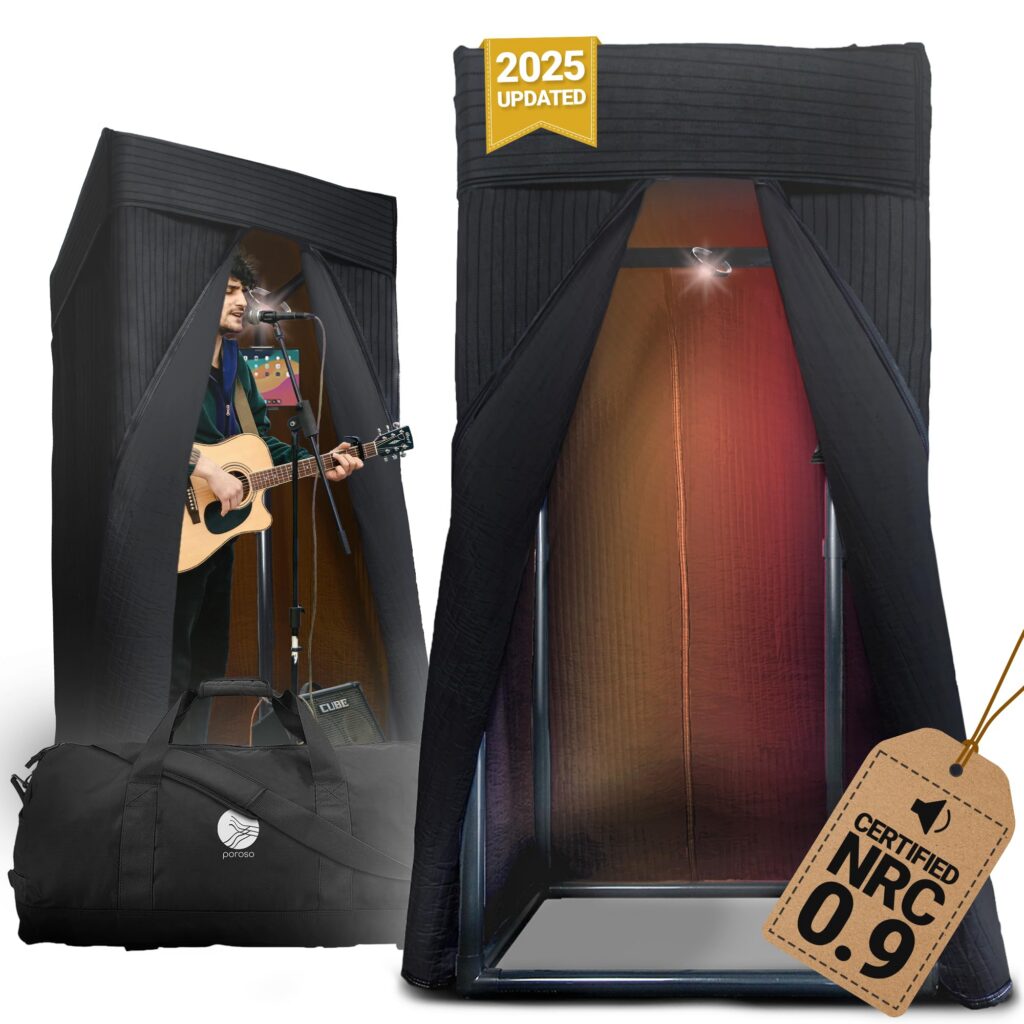
Recording crystal-clear vocals from home has become essential for podcasters, musicians, voice actors, and content creators. Whether you’re laying down tracks in your bedroom studio or recording audiobooks from your living room, achieving professional sound quality without the luxury of an expensive recording studio remains a top challenge. The solution that’s revolutionizing home recording is surprisingly accessible: portable vocal booths that transform any space into an acoustically treated recording environment. These innovative solutions range from compact desktop shields to full-size isolation booths, offering flexibility and professional results without breaking the bank or requiring permanent installation.
The market for portable recording solutions has exploded in recent years, with options spanning from $50 foam panels to $3,000+ professional isolation booths. Understanding which portable vocal booth fits your specific needs, budget, and recording environment can mean the difference between amateur-sounding recordings plagued by echo and room noise versus broadcast-quality audio that rivals professional studio productions. This comprehensive guide examines everything you need to know about portable vocal booths, including the different types available, key features to consider, expert recommendations, and practical tips for maximizing your investment in home recording equipment.
What Is a Portable Vocal Booth and Why Do You Need One?
A portable vocal booth is a sound-dampening enclosure or acoustic treatment system designed to reduce ambient noise, eliminate unwanted reflections, and create a controlled recording environment without the permanent installation or expense of traditional studio construction. Unlike fixed recording studios that require dedicated rooms with professional soundproofing, portable vocal booth solutions offer flexibility, affordability, and the ability to set up professional recording spaces in apartments, home offices, bedrooms, or even while traveling. These systems work by absorbing sound waves before they can reflect off walls, ceilings, and hard surfaces that cause the hollow, echoey quality that plagues untreated room recordings.
The fundamental problem that portable vocal booths solve is simple yet critical: bare rooms with hard surfaces create acoustic reflections that muddy your recordings with comb filtering, standing waves, and reverberant artifacts that make vocals sound unprofessional and distant. When you speak or sing into a microphone in an untreated space, sound waves travel outward in all directions, bouncing off walls, floors, windows, and furniture before returning to the microphone milliseconds later.
These delayed reflections combine with the direct sound, creating phase cancellation and a characteristic “roomy” sound that immediately identifies amateur recordings. Professional studios invest tens of thousands of dollars in acoustic treatment, bass traps, diffusers, and isolation to eliminate these problems, but portable vocal booths provide similar benefits at a fraction of the cost.
Modern portable vocal booth designs fall into several distinct categories, each addressing different recording scenarios and budget levels. Microphone isolation shields (also called reflection filters) are compact devices that mount directly on your mic stand, surrounding the back and sides of your microphone with acoustic foam or fiberglass panels that absorb reflections from behind the performer. Desktop vocal booths create a three-sided or four-sided enclosure that sits on your desk or table, providing more comprehensive isolation for seated recording sessions.
Tent-style portable booths offer full-body enclosures with fabric or composite panels stretched over collapsible frames, creating genuine isolation environments that block external noise while trapping internal sound. Professional modular systems use interlocking acoustic panels to build customizable booths of various sizes, offering studio-grade performance with the flexibility to disassemble and relocate as needed.
Voice actors, podcasters, and audiobook narrators particularly benefit from portable vocal booth solutions because their work demands consistent, professional audio quality regardless of location. A voice actor working from home might record auditions in the morning, client revisions in the afternoon, and personal projects in the evening—all requiring identical acoustic characteristics. Portable booths enable this consistency while allowing the space to serve other purposes when not recording.
Musicians and songwriters appreciate the ability to capture vocal ideas, demo tracks, and final performances without disturbing neighbors or family members, since many portable vocal booth designs provide significant sound isolation in both directions. Content creators producing YouTube videos, online courses, or social media content discover that even modest acoustic treatment dramatically improves perceived production value, making their content sound more authoritative and professional.
Types of Portable Vocal Booth Solutions Available
Microphone Isolation Shields and Reflection Filters
Microphone isolation shields represent the most affordable and compact portable vocal booth solution, typically priced between $50 and $300 depending on materials and construction quality. These curved or flat panels mount directly behind your microphone on the mic stand, using dense acoustic foam, mineral wool, or specialty composite materials to absorb sound waves traveling toward walls behind the performer.
The Aston Halo reflection filter has gained widespread professional acceptance, using a patented design with an air gap between layers that provides superior isolation compared to simple foam panels. The sE Electronics Reflexion Filter Pro remains an industry standard, featuring multiple layers of acoustic treatment materials in a precisely curved configuration that maximizes absorption across the frequency spectrum while maintaining a relatively compact footprint.
The effectiveness of microphone isolation shields depends significantly on proper placement and realistic expectations about their capabilities. These devices excel at reducing mid and high-frequency reflections from the rear hemisphere behind your microphone, which substantially cleans up the clarity and presence of vocal recordings in untreated rooms. However, they provide minimal isolation from external noise sources and limited low-frequency absorption due to their compact size—physics dictates that effective bass absorption requires substantial thickness or air gaps that small shields cannot accommodate.
Position your isolation shield approximately 6-8 inches behind the microphone capsule, ensuring the performer’s mouth falls within the acoustic “sweet spot” where the shield’s absorption pattern is most effective. Avoid placing the shield so close that it reflects sound back onto the microphone, which can create the opposite problem of making recordings sound boxy and unnatural.
Budget-conscious content creators often start with basic foam isolation shields from manufacturers like Monoprice or Neewer, which deliver noticeable improvements over completely untreated recording for $50-$100. These entry-level shields use standard acoustic foam in simple curved configurations, providing meaningful reduction of room reflections for podcasting, gaming commentary, and casual music recording.
However, professional voice actors and musicians typically invest in premium shields like the Kaotica Eyeball or Aston Halo, which employ advanced materials, optimized geometries, and better build quality that translate to superior acoustic performance and durability. The Kaotica Eyeball takes a unique approach by completely enclosing the microphone in a foam ball, creating 360-degree isolation that works remarkably well in challenging acoustic environments, though some users find it claustrophobic and the design requires specific microphone compatibility.
Desktop and Tabletop Portable Vocal Booths
Desktop portable vocal booth enclosures provide significantly more comprehensive acoustic treatment than simple reflection filters by surrounding the performer and microphone on multiple sides with sound-absorbing materials. These three-sided or four-sided boxes sit on desks, tables, or dedicated stands, creating a mini recording environment measuring roughly 24-36 inches in each dimension. The Editors Keys SL600 exemplifies this category, offering a collapsible design with high-density acoustic foam panels that fold flat for storage while providing professional isolation during recording sessions. Desktop booths work particularly well for voice actors, audiobook narrators, and podcasters who record while seated at a desk, since the booth shields both the microphone and the performer’s position from room reflections.
Construction quality varies dramatically across desktop vocal booth products, with critical differences in the density and thickness of acoustic materials, the rigidity of frame construction, and the attention to detail in panel connections and sealing. Professional-grade desktop booths like those from Studiobricks or Vocal Booth To Go use multiple layers of acoustic treatment including mass-loaded vinyl, high-density foam, and air gaps that create genuine sound isolation rather than simple sound absorption.
These premium units can effectively reduce ambient noise from HVAC systems, street traffic, and household activities while simultaneously preventing your recording from disturbing others in adjacent rooms. Budget desktop booths from manufacturers like Pyle or LyxPro focus primarily on internal acoustic treatment using basic foam panels, offering improved sound quality for your recordings without significant external noise isolation.
One often-overlooked advantage of desktop portable vocal booth systems is their ability to create visual focus and psychological comfort during recording sessions. Many performers report that the enclosed feeling of a booth helps them concentrate, reduces self-consciousness, and enables better performances compared to recording in open rooms where they feel exposed. The physical boundaries of a vocal booth also provide consistent mic positioning reference points—when you return to record the next day or next week, you can replicate your exact position relative to the microphone, ensuring tonal consistency across projects. This positional consistency matters enormously for audiobook narration, podcast series, and any project requiring multiple recording sessions to sound like they were captured in identical conditions.
Desktop booths do present practical limitations that potential buyers should understand before purchasing. The compact size that makes these units convenient also restricts movement and can feel confining during extended recording sessions, particularly for performers who like to use physical movement or gestures while recording. Ventilation becomes a genuine concern in enclosed desktop booths, as the acoustic materials that trap sound also trap body heat and carbon dioxide, making sessions uncomfortable after 20-30 minutes in smaller units.
Quality manufacturers address this by incorporating ventilation slots or breathable panel designs, but even well-ventilated booths feel noticeably warmer than recording in open air. Additionally, desktop booths require a stable, vibration-free mounting surface—placing a booth on a shaky desk or table will transmit vibrations directly to your microphone, potentially introducing low-frequency rumble that undermines the acoustic benefits.
Tent-Style and Full-Size Portable Vocal Booths
Full-size tent-style portable vocal booths represent the pinnacle of truly portable recording solutions, offering genuine acoustic isolation in packages that can be assembled, disassembled, and transported with reasonable effort. These systems use collapsible aluminum or steel frames covered with specialized acoustic panels or fabric, creating enclosed spaces ranging from 3×3 feet for compact solo booths to 6×6 feet or larger for comfortable full-body recording environments.
Suggested read: Best Portable Electric Fence Solutions: Complete Buying Guide
The Snapstudio has earned recognition as one of the most portable professional booth systems, breaking down into bags that fit in standard vehicles while assembling into a legitimate isolation booth in approximately 15 minutes. Similarly, the VocalBooth Gold Series provides professional-grade isolation in a modular design that can be configured for different spaces and disassembled for relocation or storage.
The acoustic performance of quality tent-style portable vocal booths rivals or exceeds permanently installed studio construction when properly designed and assembled. Multi-layer panel systems incorporating mass-loaded vinyl, acoustic foam, fiberglass insulation, and air gaps can achieve 25-35 dB of sound reduction across most of the frequency spectrum, effectively blocking noise from traffic, neighbors, appliances, and household activities while preventing your recording from disturbing others. This level of isolation enables professional recording in situations that would be impossible with simpler portable vocal booth solutions—apartment dwellers can record late at night without disturbing neighbors, home studio operators can work while children play in adjacent rooms, and traveling musicians can capture consistent performances in hotel rooms or temporary rehearsal spaces.
Construction materials and engineering details separate excellent tent-style booths from disappointing ones. Vocal Booth To Go manufactures their panels using a proprietary seven-layer composite that balances mass (for low-frequency blocking), absorption (for internal acoustics), and durability (for repeated assembly/disassembly cycles). Their panels incorporate sealed edges and compression gaskets at connection points to prevent sound leakage through gaps and seams, which often undermines cheaper booth designs. The Studiobricks ONE takes a different approach with rigid modular panels that interlock with precision-machined aluminum extrusions, creating an air-tight seal that delivers exceptional isolation. While heavier and less portable than fabric-based systems, rigid panel booths provide superior acoustic performance and long-term durability for semi-permanent installations.
Practical considerations around ventilation, lighting, and workflow become increasingly important with full-size portable vocal booths due to the extended time performers spend inside enclosed spaces. Professional manufacturers integrate quiet ventilation fans, LED lighting systems, and cable management solutions that transform booths from acoustic closets into comfortable, functional workspaces. The Kube from Studiobricks exemplifies thoughtful booth design with a built-in ventilation system that exchanges air without compromising acoustic isolation, dimmable LED lighting that prevents eye strain during long sessions, and equipment mounting points that keep cables organized and prevent trip hazards. Budget booth manufacturers often neglect these details, leaving users to retrofit lighting, fans, and cable management—an oversight that significantly impacts the usability of the space for professional work.
Price ranges for tent-style and full-size portable vocal booth systems vary from approximately $1,500 for basic models to $5,000+ for professional systems with advanced features. The VocalBooth Platinum Package represents a mid-range option at roughly $3,000, delivering professional isolation, decent ventilation, and quality construction that should survive years of regular use. For approximately $1,500-$2,000, the Porta-Booth Plus provides a more budget-friendly full-size option with good acoustic performance but simpler construction and fewer amenities. At the premium end, Studiobricks systems start around $4,000-$5,000 but provide truly professional-grade isolation, superior build quality, and comprehensive features that justify the investment for serious professionals.
Key Features to Consider When Choosing a Portable Vocal Booth
Acoustic Treatment Quality and Sound Isolation Performance
The acoustic treatment quality of a portable vocal booth fundamentally determines whether it will deliver professional results or merely provide a marginal improvement over recording in an untreated room. Effective acoustic treatment requires addressing both sound absorption (reducing internal reflections and reverb) and sound isolation (blocking external noise and preventing sound from escaping). Absorption coefficient measurements indicate how much sound energy a material absorbs rather than reflects, with coefficients ranging from 0 (complete reflection) to 1 (complete absorption) across different frequencies. Professional acoustic foam and mineral wool typically achieve absorption coefficients above 0.85 for mid and high frequencies, while less effective materials like carpet or thin foam might only reach 0.3-0.5.
Low-frequency absorption presents the greatest challenge for portable vocal booth designs because effective bass absorption requires substantial material thickness or air gaps that compact units struggle to provide. The wavelength of a 100 Hz tone measures approximately 11 feet, meaning effective absorption of these low frequencies demands either material thickness approaching several feet or resonant absorber designs that use air cavities tuned to specific frequencies.
Premium portable booths address this through multi-layer panel construction with air gaps, membrane absorbers, or Helmholtz resonators that provide meaningful low-frequency treatment despite space constraints. Budget booths typically sacrifice low-frequency performance, focusing absorption in the vocal-critical range of 200 Hz to 5 kHz where human speech and singing contain most of their energy and where problems are most audible to listeners.
Sound isolation performance, measured in Sound Transmission Class (STC) ratings, quantifies how many decibels of sound reduction a barrier provides. Standard interior drywall construction typically achieves STC ratings around 33-35, while professional studio walls with double-stud construction and multiple layers of isolation materials might reach STC 55-65. Quality portable vocal booth systems typically achieve STC ratings in the 25-35 range, providing noticeable but not complete isolation from external noise.
This level of isolation effectively reduces constant background noise like HVAC systems, distant traffic, and household appliances to manageable levels while significantly attenuating but not completely eliminating louder transient sounds like door slams, barking dogs, or nearby conversations. For reference, every 10 dB reduction represents a perceived halving of loudness, so a booth with 30 dB isolation makes external sounds seem approximately 1/8 as loud as they would without the booth.
When evaluating portable vocal booth acoustic performance, examine both manufacturer specifications and independent user reviews with healthy skepticism. Some manufacturers publish impressive-sounding specifications that represent best-case measurements under ideal conditions or at specific frequencies rather than realistic broadband performance. Look for third-party testing results, acoustic measurement graphs showing performance across the frequency spectrum, or detailed customer reviews from professional users who have measured their booths with acoustic measurement equipment. The most honest manufacturers provide frequency-specific absorption data showing how performance varies from low to high frequencies, acknowledging that no portable solution provides perfect acoustic treatment at all frequencies.
Portability, Setup Time, and Storage Requirements
True portability varies dramatically across products marketed as portable vocal booths, with critical differences in weight, disassembly complexity, storage footprint, and durability through repeated setup/takedown cycles. A microphone isolation shield that weighs 3 pounds and stores in a closet corner represents vastly different portability than a 100-pound modular booth that requires 30 minutes to disassemble and fills a significant storage space.
Define your specific portability requirements before shopping—do you need to pack the booth in a vehicle for location recording, or simply want the option to reclaim the space for other uses when not recording? Will you set up once and leave it assembled for months, or do you need to assemble and disassemble weekly or daily? Honest answers to these questions guide you toward appropriate solutions.
Desktop and microphone shield portable vocal booth systems offer maximum convenience with minimal setup requirements, typically deploying in under 5 minutes with no tools required. The Aston Halo mounts to any standard mic stand in seconds using a universal adapter, while desktop booths like the Editors Keys SL600 simply unfold and place on your desk, ready for recording. These solutions work brilliantly for users who record regularly in the same location and value quick access over maximum acoustic performance. Storage requirements remain modest—collapsed desktop booths typically occupy roughly 30x24x6 inches, easily fitting in closets, under beds, or behind furniture, while isolation shields hang on walls or store in small closets alongside other recording equipment.
Tent-style and full-size portable vocal booth systems demand more significant time investment for setup and teardown, typically requiring 15-45 minutes depending on size and design complexity. The VocalBooth Gold Series assembles using a simple frame-and-panel system where fabric-wrapped panels slip onto an aluminum frame, completing setup in approximately 20 minutes without tools once you’ve practiced the process. More complex modular systems like Studiobricks require precise panel alignment, tightening of connection hardware, and installation of ventilation and lighting systems, potentially consuming 45-60 minutes for initial setup by one person.
Consider whether you have physical space to leave the booth assembled permanently or semi-permanently—most users who regularly disassemble full-size booths report that the time and effort involved eventually leads to reduced usage or abandonment of the equipment.
Storage requirements for disassembled full-size portable booths significantly impact their practicality for many home studio owners. A compact 3×3 foot booth might break down into panels totaling 4×2 feet by 12 inches thick weighing approximately 60-80 pounds, requiring substantial closet space or garage storage. Larger 4×6 foot professional booths can produce storage packages exceeding 6×3 feet and 150 pounds, challenging for individuals to move and demanding dedicated storage areas.
The Snapstudio addresses this with an impressively compact storage footprint—the entire 3.5×3.5 foot booth packs into bags totaling roughly 40x20x12 inches that fit in vehicle trunks or closets. However, this convenience comes with engineering trade-offs in panel rigidity and long-term durability compared to more robust systems that sacrifice portability for performance.
Ventilation, Comfort, and Usability Features
Ventilation deserves serious consideration for any enclosed portable vocal booth, as inadequate air circulation creates genuine comfort and health concerns during extended recording sessions. When you’re sealed inside an acoustically isolated space, your breathing consumes oxygen and produces carbon dioxide, while your body heat has nowhere to dissipate. Within 15-20 minutes in a poorly ventilated booth, most performers experience noticeable stuffiness, increased breathing rate, and reduced mental clarity that degrades performance quality. Some performers also report feeling claustrophobic or anxious in small, enclosed booths with poor ventilation, particularly during demanding vocal performances that require deep breathing and physical exertion.
Professional portable vocal booth manufacturers integrate active or passive ventilation systems that exchange air without significantly compromising acoustic isolation. The Studiobricks ventilation system uses a quiet fan to exhaust stale air through an acoustic labyrinth that maintains sound isolation while allowing continuous airflow, effectively solving the oxygen/CO2 exchange problem for all-day recording sessions. WhisperRoom booths incorporate passive ventilation ducting with sound-dampening materials that permits air circulation without creating noise pathways, though the passive approach provides less dramatic air exchange than active systems. Budget booth manufacturers often completely neglect ventilation, leaving users to crack doors, install their own fans, or simply endure uncomfortable conditions—a frustrating oversight that significantly impacts the usability of otherwise decent acoustic equipment.
Interior lighting profoundly affects the usability and comfort of enclosed portable vocal booths, yet many entry-level products provide no integrated lighting solution. Recording in a dimly lit booth for extended periods causes eye strain, makes reading scripts difficult, and creates a generally unpleasant working environment that performers subconsciously resist using. Professional booths incorporate LED lighting systems with dimming controls that provide adequate illumination for reading scripts and operating equipment without generating excessive heat or causing audio interference.
The color temperature of booth lighting matters more than many realize—cool white LEDs (5000K+) improve alertness and script readability but can feel harsh and clinical, while warm white LEDs (3000K) create a more comfortable atmosphere but may make some performers feel drowsy during long sessions. Some professional voice actors install adjustable color temperature lighting systems that let them customize the mood for different types of recording work.
Practical workflow considerations like cable management, equipment mounting points, and door design substantially impact daily usability. Thoughtfully designed booths provide cable pass-through grommets that seal against air leaks while allowing microphone cables, headphone cables, and power connections to enter the booth cleanly. Equipment mounting options for microphone stands, shock mounts, and accessories eliminate the need to balance gear precariously or take up limited floor space with boom stands. Door design varies from simple fabric flaps on budget booths to engineered compression-seal doors on professional systems—the difference matters significantly for both acoustic isolation and ease of entry/exit. The
Suggested read: The Best Hairdresser Sink Portable Options for Mobile Stylists in 2025
VocalBooth Platinum uses a compression seal door that closes flush against acoustic gaskets, maintaining isolation while still opening easily from inside or outside, whereas cheaper booths often use Velcro closures or magnetic flaps that require two hands to seal properly and may not provide consistent isolation.
Top Portable Vocal Booth Recommendations by Budget and Use Case
Best Budget Options Under $200
For content creators, podcasters, and musicians beginning their recording journey, several portable vocal booth solutions under $200 provide meaningful acoustic improvements without significant financial commitment. The Monoprice Reflection Filter represents exceptional value at approximately $50-$60, offering a basic foam isolation shield that mounts to standard mic stands and effectively reduces mid and high-frequency reflections in untreated rooms. While the acoustic foam is less dense than premium alternatives and the frame construction feels somewhat flimsy, the Monoprice shield delivers noticeable improvement in recording clarity for podcasting, voice-over work, and casual music recording. The curved design provides reasonable coverage behind the microphone, and the universal mounting bracket fits most shock mounts and mic stands without compatibility issues.
The Neewer Desktop Isolation Shield expands coverage to approximately 24×16 inches while maintaining a budget-friendly price around $70-$90. This five-panel design includes a bottom panel that absorbs reflections from your desk surface—an often-overlooked source of acoustic problems when recording at seated positions. The Neewer shield uses standard acoustic foam in a folding configuration that stores flat when not in use, making it practical for home studios with limited space.
Users report that this shield works particularly well for improving podcast and YouTube audio when recording in home offices or bedrooms with moderate ambient noise. However, the thin foam panels provide minimal sound isolation from external noise, and the lightweight construction can feel unstable on less expensive mic stands with weak boom arms.
The LyxPro VRI-10 desktop vocal booth represents the best all-around value in the sub-$200 category for users who want more comprehensive coverage than simple isolation shields. Priced around $150-$180, this collapsible three-panel booth measures approximately 24x24x12 inches when assembled, creating a proper mini recording environment that surrounds both microphone and performer.
The VRI-10 uses multiple layers of acoustic foam and reflective materials in a removable fabric covering that can be cleaned or replaced. Assembly requires no tools—the panels connect with hook-and-loop fasteners and collapse flat to roughly 24x24x2 inches for storage. While the acoustic performance doesn’t rival professional booths, the LyxPro provides surprisingly good internal acoustics for its price, making it popular with audiobook narrators, podcasters, and home studio musicians recording vocals and acoustic instruments.
These budget portable vocal booth options share important limitations that buyers should understand. The thin acoustic foam used in sub-$200 products provides minimal low-frequency absorption, meaning bass frequencies in your voice or instruments will still excite room modes and create uneven frequency response in recordings. External noise isolation is negligible—these products improve internal acoustics by reducing reflections, but don’t block sounds from outside the recording space or prevent your recording from being heard in adjacent rooms.
Build quality tends toward the fragile, with foam that deteriorates over several years, frames that bend with rough handling, and connections that loosen with repeated use. Despite these limitations, budget portable booths serve important roles as entry points for beginners and as supplementary treatment for experienced recordists working in challenging acoustic environments.
Mid-Range Professional Options ($200-$1,500)
The $200-$1,500 price range offers substantially improved acoustic performance, build quality, and professional features compared to budget options. The sE Electronics Reflexion Filter Pro ($300-$350) has earned legendary status among professional voice actors and home studio engineers as the gold standard for portable microphone isolation. This multi-layer design uses seven distinct layers of acoustic materials including polyester wool, aluminum, tensioned fabric membranes, and air gaps arranged in a precisely optimized configuration.
The curved shape and mounting system allow fine adjustment of angle and distance from the microphone, letting users dial in the optimal acoustic balance for their specific recording situation. While significantly more expensive than budget shields, the Reflexion Filter Pro delivers genuinely professional acoustic performance that remains effective in challenging room acoustics.
The Aston Halo ($350-$400) represents a newer generation of reflection filter design that some professionals argue surpasses even the sE Electronics standard. Rather than using a solid curved panel, the Halo employs a patented “laterally vented system” with an air gap between absorption layers that dissipates sound energy more effectively than conventional designs. The Halo also addresses common complaints about reflection filters creating boxy-sounding recordings by using a more open geometry that maintains natural vocal tone while still reducing room reflections. Professional reviews consistently praise the Halo’s transparent sound character—recordings made with the Halo sound like they were captured in a well-treated room rather than having a “filtered” or “processed” quality that some isolation shields impart.
For users requiring more comprehensive isolation than microphone shields provide, the Porta-Booth Plus ($1,200-$1,400) delivers a full-size portable vocal booth experience at a mid-range price point. This tent-style design creates a 40x30x20 inch internal recording space using heavy-duty acoustic blanket materials stretched over a collapsible steel frame. The Porta-Booth provides genuine sound isolation, reducing external noise by approximately 15-20 dB while significantly improving internal acoustics through multi-layer absorption materials. Assembly requires roughly 20 minutes and no tools—the frame sections connect with spring-loaded buttons while the acoustic panels attach with Velcro strips. Thousands of professional voice actors use Porta-Booth systems successfully for audiobook narration, commercial voice-over, and animation recording, though some find the enclosed space cramped during extended sessions.
The VocalBooth Silver Package ($1,200-$1,500) takes a modular panel approach rather than tent-style design, using rigid foam-core panels covered with acoustic fabric that connect to create a semi-permanent booth structure. This system offers advantages in expandability—users can purchase additional panels to enlarge the booth or reconfigure it for different spaces—and typically provides slightly better acoustic isolation than tent-style designs due to the rigid panel construction and tighter sealing at connection points.
The Silver Package includes a ventilation panel with acoustic damping to address the air circulation issues that plague cheaper booths. While less convenient to disassemble and transport than tent-style options, the rigid panel construction delivers superior durability and acoustic consistency for users who can dedicate space to a semi-permanent booth installation.
Premium Professional Systems ($1,500-$5,000+)
Premium portable vocal booth systems in the $1,500-$5,000+ range deliver acoustic performance and build quality comparable to permanently installed studio construction while maintaining true portability. The VocalBooth Gold Package ($2,500-$3,000) represents the standard bearer in this category, used by Grammy-winning recording engineers, major audiobook publishers, and professional voice-over studios. The Gold Package uses seven-layer acoustic panels incorporating mass-loaded vinyl, acoustic foam, fiberglass insulation, and air gaps in a carefully engineered configuration that achieves 25-30 dB sound reduction across most frequencies. The modular design assembles without tools using a cam-lock connection system that creates air-tight seals between panels, while integrated ventilation maintains comfortable air quality during all-day recording sessions.
The Studiobricks ONE ($4,000-$5,000) provides a completely different approach with precision-engineered modular panels that interlock using aluminum extrusions and compression seals. This system achieves exceptional acoustic isolation (30-35 dB reduction) through rigid double-wall panel construction with resilient channel mounting that decouples the inner and outer panel layers. The ONE includes integrated LED lighting, a professionally designed ventilation system with acoustic labyrinths, and a compression seal door that maintains isolation while opening smoothly with one hand. While significantly more expensive than fabric-based systems, Studiobricks booths offer superior acoustic performance, professional aesthetics suitable for client-facing studios, and virtually indestructible construction that should last decades of heavy use.
The WhisperRoom SE4000 series ($4,500-$6,500 depending on configuration) represents the pinnacle of portable booth engineering for users who prioritize absolute acoustic isolation. WhisperRoom constructs their booths using double-wall panels with 2.5-inch internal air gaps, resilient channel mounting, and acoustic fiberglass insulation that achieves sound reduction ratings of 30-40 dB—approaching the performance of permanent studio construction.
The SE4000 series includes professional features like piano-hinge doors with compression seals, optional windows for visibility or light transmission, and multiple ventilation configurations including silent passive systems and powered exchange systems. While extremely heavy (500+ pounds for a 4×4 foot booth) and requiring several hours for initial assembly, WhisperRoom booths provide uncompromising acoustic isolation for professional studios, broadcast facilities, and serious home recordists who need to record in challenging acoustic environments.
For users seeking the ultimate in portable vocal booth convenience, the Snapstudio ($3,500-$4,000) delivers professional acoustic performance in a genuinely portable package. The entire booth—including frame, panels, ventilation, lighting, and accessories—packs into three bags totaling approximately 100 pounds that fit in standard vehicles. Assembly by one person takes roughly 15 minutes once familiar with the system, making Snapstudio practical for location recording, tour documentation, or frequently reconfigured studio spaces.
The acoustic performance approaches fixed systems through innovative panel design using tensioned fabric layers over rigid frames, though the trade-off for convenience is slightly less isolation than heavier modular systems. Professional touring musicians, documentary filmmakers, and recording engineers working on location projects favor Snapstudio for its unique combination of portability and performance.
Setting Up and Optimizing Your Portable Vocal Booth
Room Selection and Positioning Strategies
The room where you place your portable vocal booth significantly impacts the final acoustic performance, even though the booth itself provides isolation and treatment. Select the quietest room available in your home—typically bedrooms or interior rooms away from street-facing walls, HVAC systems, and appliances generate the least ambient noise. Walk-in closets often serve as excellent booth locations because the hanging clothes provide additional acoustic absorption while the enclosed space naturally reduces ambient noise. However, avoid placing booths in corners where bass frequency build-up can overwhelm the booth’s low-frequency absorption capacity, creating boomy, uneven recordings even with quality equipment.
Position your portable vocal booth away from parallel walls when possible to reduce standing waves and flutter echoes that the booth cannot completely eliminate. If the only available space forces positioning between parallel walls, hang moving blankets, acoustic panels, or even bookcases filled with books on the surrounding walls to break up reflections before they reach the booth.
The distance from your booth to surrounding walls matters—leaving at least 2-3 feet of space between the booth exterior and room walls allows some acoustic decoupling, reducing the transmission of vibrations and standing waves from the room into the booth. This spacing also improves ventilation by allowing air circulation around the booth, which helps manage the heat build-up that occurs in enclosed recording spaces.
Suggested read: Lightweight Portable Security: Essential Solutions for Mobile Protection in 2025
Consider the microphone placement and orientation within your booth as carefully as the booth placement within the room. Position your microphone facing the deepest dimension of the booth so sound waves have maximum distance to travel before encountering boundaries. For example, in a rectangular booth, orient your recording position so you’re speaking into the long axis rather than the short axis. This positioning gives sound waves more time and distance to be absorbed by acoustic materials before reflecting back toward the microphone. The exception to this guideline occurs when one dimension of the booth has significantly better acoustic treatment—in that case, orient toward the best-treated surface even if it’s the shorter dimension.
External factors like HVAC systems, refrigerators, computer fans, and other constant noise sources require strategic management even with quality portable vocal booth isolation. Record during quieter times of day when neighborhood activity, traffic, and household noise reach minimum levels—early morning often provides the quietest window in residential areas. Turn off or temporarily disable noisy systems like air conditioning, heating, and desktop computers during recording takes if possible. Some professionals install separate quiet recording computers (fanless models or laptops) dedicated solely for recording work, keeping the noisier main production computer in an adjacent room where fan noise won’t contaminate recordings.
Microphone Selection and Placement Techniques
The relationship between microphone choice and portable vocal booth acoustics deserves more attention than it typically receives. Large-diaphragm condenser microphones with cardioid polar patterns represent the most popular choice for booth recording because their directional pickup pattern naturally rejects sound from the rear and sides, complementing the booth’s acoustic treatment.
The Rode NT1 ($200-$270) delivers exceptional value with a self-noise specification of just 4.5 dBA—among the quietest microphones available at any price—making it ideal for revealing the acoustic benefits of your booth without the microphone itself contributing noise to recordings. The Audio-Technica AT4040 ($300-$350) provides a slightly brighter, more presence-focused sound that helps vocals cut through dense mixes, though its higher self-noise (12 dBA) becomes more noticeable in quiet acoustic environments.
Dynamic microphones like the Shure SM7B ($400) or Electrovoice RE20 ($450) offer advantages for portable booth recording that many beginners overlook. These microphones’ reduced sensitivity compared to condensers means they pick up less room noise and reflections, sometimes producing cleaner recordings than condensers in less-than-perfect acoustic environments. The SM7B particularly excels for broadcasters, podcasters, and vocalists with strong voices who work close to the microphone, where its bass proximity effect and natural presence peak create an authoritative, professional vocal tone.
However, dynamic microphones require significantly more gain than condensers, making a clean preamp or audio interface with plenty of headroom essential—pairing an SM7B with a cheap interface that doesn’t provide sufficient clean gain defeats the purpose of the mic’s low sensitivity.
Microphone positioning within the booth follows the same principles as studio recording but requires additional attention to distance from booth walls and acoustic materials. Position the microphone approximately 6-12 inches from your mouth for most vocal applications, adjusting based on vocal dynamic range, desired tonal characteristics, and microphone proximity effect. When working with directional microphones in portable vocal booths, slightly angle the microphone’s null (rear rejection point) toward the most acoustically problematic surface of the booth, maximizing the benefit of both the mic’s polar pattern and the booth’s absorption. For example, if your booth has better acoustic treatment on the sides than the rear, angle the microphone’s null toward the rear surface to reject those weaker-treated reflections.
The proximity effect—bass frequency boost that occurs when sound sources move closer to directional microphones—requires conscious management in booth recording. Performers with naturally bass-heavy voices might maintain 8-12 inches from the microphone to minimize proximity effect, preserving natural tonal balance without requiring excessive EQ correction in post-production. Conversely, performers with thin-sounding voices sometimes exploit proximity effect by working 4-6 inches from the microphone, using the natural bass boost to add weight and authority to their vocal tone. Experiment with mic distance during booth setup rather than after recording, since proximity effect cannot be convincingly added or removed in post-production—it’s fundamentally a product of microphone position during the original recording.
Acoustic Treatment and Sound Quality Optimization
Even after investing in a quality portable vocal booth, additional acoustic treatment in and around the booth often yields noticeable improvements in recording quality. Place acoustic panels or moving blankets on walls immediately surrounding the booth exterior to reduce room reflections that can enter the booth through ventilation openings or less-perfectly-sealed connection points. Bass traps positioned in room corners near the booth address low-frequency issues that portable booths struggle to control—remember that bass frequencies have wavelengths measured in feet, allowing them to “leak” around and through booth structures that effectively block higher frequencies. GIK Acoustics and Auralex manufacture corner bass traps specifically designed for home studios, typically costing $100-$150 per trap.
Interior acoustic treatment additions can optimize booth performance beyond manufacturer specifications. Some voice actors line booth floors with thick area rugs or carpet tiles to absorb floor reflections that create comb filtering and coloration in vocal recordings. Others add small acoustic panels to internal booth surfaces showing reflective characteristics—if your booth uses fabric wall coverings over foam, adding patches of higher-density absorption materials in strategic locations can address specific frequency problems revealed through acoustic measurement or critical listening. However, avoid over-treating booth interiors, as excessive absorption creates unnaturally dead acoustics that make recordings sound lifeless and disconnected. The goal is controlled acoustics, not complete acoustic annihilation.
Acoustic measurement tools help optimize portable vocal booth setup through objective analysis rather than guesswork. The Room EQ Wizard (free software) combined with a calibrated measurement microphone like the MiniDSP UMIK-1 ($100) reveals specific acoustic problems in your booth, showing frequency response irregularities, reflection patterns, and resonances that might not be obvious through casual listening. Measure your booth’s frequency response at your normal recording position, noting peaks and dips that indicate acoustic problems. Peaks often indicate resonances or standing waves, while dips typically result from phase cancellation between direct and reflected sound. Address significant issues (deviations exceeding 6-10 dB) through acoustic treatment additions, microphone repositioning, or performer position adjustments before accepting the booth’s basic acoustic performance.
Critical listening comparisons between your booth recordings and professional reference tracks help calibrate your expectations and identify remaining acoustic issues. Import commercial recordings of similar vocal material into your DAW, level-matching them to your booth recordings for fair comparison. Listen specifically for differences in clarity, definition, room tone, and frequency balance—these characteristics directly reflect acoustic quality. If your recordings sound muddy, boxy, or distant compared to references, the booth acoustics require additional optimization through position changes, treatment additions, or microphone selection. If your recordings sound harsh, brittle, or aggressive, you may have over-absorbed the space or positioned the microphone too close to highly reflective surfaces within the booth.
Common Portable Vocal Booth Mistakes and Solutions
Over-treating or Under-treating the Acoustic Space
One of the most common mistakes with portable vocal booth use involves misjudging the amount of acoustic treatment needed for specific recording applications. Many beginners assume that more acoustic treatment automatically equals better sound quality, packing booths with additional foam panels, blankets, and absorption materials until the space becomes acoustically dead. This over-treatment strips natural liveliness and dimension from vocal recordings, making them sound flat, disconnected, and requiring extensive artificial reverb in mixing to restore dimensional characteristics. Professional voice actors describe properly treated booth acoustics as “present and intimate” rather than “dead and muffled”—your booth should control room reflections without completely removing the sense of acoustic space that makes recordings sound natural and engaging.
The opposite problem—under-treating challenging acoustic environments—leads equally poor results through a different mechanism. Some users purchase minimal isolation shields or basic desktop booths, expecting these simple solutions to transform terrible room acoustics into studio-quality recording environments. When the modest treatment fails to eliminate significant echo, room reverb, and ambient noise, users become frustrated with the equipment rather than recognizing that more comprehensive acoustic treatment is required. Honestly assess your room’s baseline acoustics before purchasing a portable vocal booth—highly reflective rooms with hard surfaces (tile, hardwood, large windows, bare walls) demand more aggressive acoustic treatment than carpeted bedrooms with soft furnishings and fabric window treatments.
Balance acoustic treatment by focusing on problem frequencies specific to your recording application and space. Voice-over work and podcast recording benefit from aggressive high-frequency absorption since clarity and intelligibility depend on clean mid and high-frequency reproduction without smearing from reflections. Music recording often tolerates or even benefits from some high-frequency reflection that creates a sense of “air” and dimension in recordings, but demands tight control of low-frequency resonances that create muddiness and uneven tonal balance. Measure your booth’s performance with acoustic analysis tools or conduct critical listening tests with material similar to your intended recording work, adjusting treatment levels to optimize specifically for your applications rather than pursuing theoretical acoustic perfection.
Environmental factors outside the booth often undermine otherwise good acoustic treatment. Hard flooring reflects sound upward into the booth, window glass reflects sound despite nearby acoustic treatment, and HVAC ductwork transmits vibrations and airborne noise that no amount of booth treatment can eliminate. Address these external factors through strategic room selection, temporary treatments during recording sessions (hanging blankets over windows, placing rugs over hard floors), or targeted acoustic treatment on surfaces immediately surrounding the booth.
The most expensive portable vocal booth cannot overcome fundamentally poor room selection—investing $3,000 in a premium booth while recording in a bare room with tile floors and large windows produces inferior results compared to a $500 booth placed thoughtfully in a carpeted bedroom with soft furnishings.
Ventilation Problems and Physical Comfort Issues
Underestimating ventilation requirements represents perhaps the single most common mistake that reduces portable vocal booth usability. Many users excitedly set up new booths, begin recording, and within 15-20 minutes find themselves short of breath, uncomfortably warm, and mentally foggy from oxygen depletion and carbon dioxide buildup. This experience is so universal among enclosed booth users that professional voice actors discuss “booth endurance” as a learned skill—the ability to maintain performance quality despite environmental discomfort. However, proper booth design and management should minimize this problem rather than forcing performers to adapt to poor conditions.
If your booth lacks integrated ventilation, implement supplementary solutions that improve air quality without significantly compromising acoustic isolation. A small USB-powered desk fan positioned outside the booth, blowing air through any available openings, provides dramatic improvement with minimal setup effort and cost. Some voice actors install computer cooling fans in booth ventilation openings, using acoustic ducting (dryer vent tubing packed with acoustic foam) to maintain isolation while moving air.
More elaborate solutions involve bathroom exhaust fans connected through acoustic labyrinths, though this requires some DIY construction skill and potentially permanent modifications to the booth structure. Remember that even modest air movement helps—completely sealed booths become uncomfortable far more quickly than booths with small air leaks or simple passive ventilation.
Physical comfort extends beyond air quality to include temperature management, ergonomic positioning, and adequate space for natural movement during performances. Booth interiors heat up quickly from body temperature, lighting systems, and lack of air circulation, making temperature management critical for extended sessions. LED lighting generates less heat than incandescent or halogen alternatives, immediately improving thermal comfort. Dress in breathable, moisture-wicking fabrics rather than heavy materials that trap heat. Take regular breaks outside the booth—many professional voice actors work in 20-30 minute sessions with 5-10 minute breaks, maintaining peak performance quality rather than grinding through exhaustion in marathon sessions that produce progressively degrading takes.
Ergonomic positioning within compact booths requires conscious attention to posture, mic position, and movement space. Stand rather than sit when possible, as standing naturally improves breathing mechanics and vocal projection while preventing the slouched posture that often develops during seated recording sessions. Ensure adequate headroom so you’re not ducking or craning your neck, as awkward neck positions create vocal tension that degrades performance quality.
Some performers who must record seated install bar stools rather than office chairs, as the elevated position improves breathing mechanics and reduces tendency toward collapsed posture. If your booth feels claustrophobic or restrictive, experiment with partial enclosure—leaving the booth door slightly ajar or removing one panel—which may provide adequate acoustic improvement while eliminating the psychological discomfort of complete enclosure.
Suggested read: Best Portable Shower for Elderly: Safe Bathing Solutions for Seniors at Home
FAQs About Portable Vocal Booths
What is the difference between a portable vocal booth and a reflection filter?
A reflection filter (also called an isolation shield) is a curved or flat panel that mounts behind your microphone, absorbing sound reflections from the rear while leaving the sides and front open. A portable vocal booth is a larger enclosure that surrounds the performer and microphone on multiple sides or completely, providing more comprehensive acoustic treatment and often some degree of external noise isolation. Reflection filters cost $50-$400 and work well for basic acoustic improvement, while full portable booths range from $500-$5,000+ and deliver professional isolation.
Can a portable vocal booth completely eliminate room echo and outside noise?
No portable vocal booth can completely eliminate room echo and outside noise, though quality systems dramatically reduce both issues. Professional portable booths typically achieve 25-35 dB of sound reduction, which makes external noise approximately 1/8 to 1/16 as loud as it would be without the booth. Internal reflections and reverb are reduced even more significantly through absorption materials. However, very loud external sounds (construction, sirens, aircraft) will still be audible in recordings, and low-frequency noise is particularly difficult for portable booths to block completely.
How much space do I need for a portable vocal booth setup?
Space requirements vary dramatically by system type. Microphone isolation shields require only your existing desk or table space with a mic stand. Desktop booths need approximately 3×2 feet of desk surface. Compact tent-style booths require roughly 4×4 feet of floor space, while professional full-size booths may need 6×6 feet or larger. Additionally, allow 2-3 feet of clearance around the booth exterior for access, ventilation, and acoustic decoupling from room walls. Measure your available space carefully before purchasing to ensure adequate room for comfortable use.
Will a portable vocal booth work in an apartment without disturbing neighbors?
Quality portable vocal booths provide meaningful sound isolation that reduces volume transmitted to adjacent apartments, typically making normal-volume singing or speaking unlikely to disturb neighbors. However, loud singing, yelling, or instruments played at high volumes may still be audible through apartment walls even with professional booths. Test your booth by having someone listen from adjacent rooms or asking neighbors for feedback during initial recording sessions. Recording during reasonable hours (avoiding early morning or late evening) and maintaining moderate performance volumes maximizes the likelihood of peaceful neighbor relationships.
What’s the best budget portable vocal booth for podcasting?
For podcasting specifically, the LyxPro VRI-10 desktop booth ($150-$180) or the Aston Halo reflection filter ($350-$400) represent the best budget options depending on whether you prefer enclosed or open-air recording. The LyxPro provides more comprehensive acoustic treatment and helps performers focus on the recording task, while the Aston Halo offers superior acoustic performance without the enclosed feeling some find claustrophobic. Both products dramatically improve podcast audio quality compared to recording in untreated rooms, delivering professional-sounding results that listeners perceive as higher production value.
Do I need a treated room if I have a portable vocal booth?
A portable vocal booth reduces the importance of room treatment but doesn’t completely eliminate it. The booth primarily addresses acoustic issues within the recording space itself, but the room’s characteristics still affect overall sound quality. Select the quietest, most acoustically favorable room available, preferably with carpet, soft furnishings, and minimal hard reflective surfaces. Adding acoustic panels or bass traps around the booth exterior improves isolation and reduces low-frequency problems that booths struggle to control. However, a good booth in a poor room will still outperform no booth in an excellent room for most home recording scenarios.
How long does it take to set up a portable vocal booth?
Setup time varies from seconds for isolation shields to 45+ minutes for complex modular systems. Microphone reflection filters mount to mic stands in under one minute. Desktop booths typically unfold and deploy in 5-10 minutes. Tent-style booths like the Snapstudio require 15-20 minutes once you’re familiar with the process, while modular panel systems like Studiobricks may take 30-45 minutes for initial assembly by one person. Most users leave permanent or semi-permanent booths assembled rather than setting up and tearing down frequently, as the time investment becomes annoying with daily or weekly setup cycles.
Can I build a DIY portable vocal booth instead of buying one?
Many recordists successfully build DIY portable vocal booths using PVC pipe frames with moving blankets, acoustic foam panels on plywood boards, or converted closets and small rooms with added treatment. DIY approaches can save significant money—materials for a basic tent-style booth might cost $200-$400 versus $1,500+ for commercial equivalents. However, DIY booths require construction skills, time investment, and often multiple iterations to achieve good results. Commercial booths benefit from engineering optimization, refined designs, and proper materials selection that DIY builders must discover through trial and error. For users with limited construction experience or time, commercial booths typically deliver better results despite higher cost.
Take Your Home Recording to the Next Level with a Portable Vocal Booth
Professional-quality vocal recordings no longer require expensive studio rentals or permanent construction projects that compromise your living space. Modern portable vocal booth solutions provide genuinely effective acoustic treatment for every budget level, from $50 microphone shields that noticeably improve podcast clarity to $5,000 professional systems that rival dedicated studio construction. The right booth choice depends on your specific recording applications, available space, budget constraints, and portability requirements—factors that vary dramatically across different users and recording scenarios.
Whether you’re a voice actor pursuing audiobook narration contracts that demand broadcast-quality audio, a musician capturing vocal demos and final takes in your bedroom studio, a podcaster building an audience through consistent, professional-sounding content, or a content creator distinguishing your videos through superior audio quality, a portable vocal booth represents one of the most impactful investments you can make in your recording setup. Unlike microphones, interfaces, and digital tools that require complementary equipment to deliver benefits, a quality booth immediately improves every recording you make by addressing the fundamental acoustic issues that plague untreated spaces.
The portable recording market continues evolving with improved materials, innovative designs, and better value propositions emerging regularly. Research current options thoroughly, read professional reviews, and when possible, test booths before committing to expensive purchases. Many music retailers offer return policies that allow in-home testing, while some manufacturers maintain demo units at trade shows and industry events. Don’t hesitate to contact manufacturers directly with specific questions about acoustic performance, compatibility with your recording space, or recommendations for your particular applications—quality manufacturers employ knowledgeable staff who can provide valuable guidance beyond marketing specifications.
For additional recording equipment and portable solutions for various applications, explore options at The Portable Shop, where you’ll find resources for optimizing your mobile recording setup. Start improving your recordings today by selecting the portable vocal booth solution that matches your needs, budget, and recording ambitions—your listeners and clients will immediately notice the difference.
Related Resources:
- Professional Recording Equipment Guide
- Leading manufacturers like Aston, sE Electronics, and Studiobricks offer detailed acoustic specifications and setup guides on their websites
- Audio engineering forums provide real-world user experiences and setup optimization tips from working professionals
- YouTube channels focusing on home studio recording demonstrate comparative tests and practical setup techniques for various booth types
This comprehensive guide to portable vocal booths provides current information based on 2025 market research and professional audio engineering principles, helping you make informed decisions about acoustic treatment investments for your home recording needs.