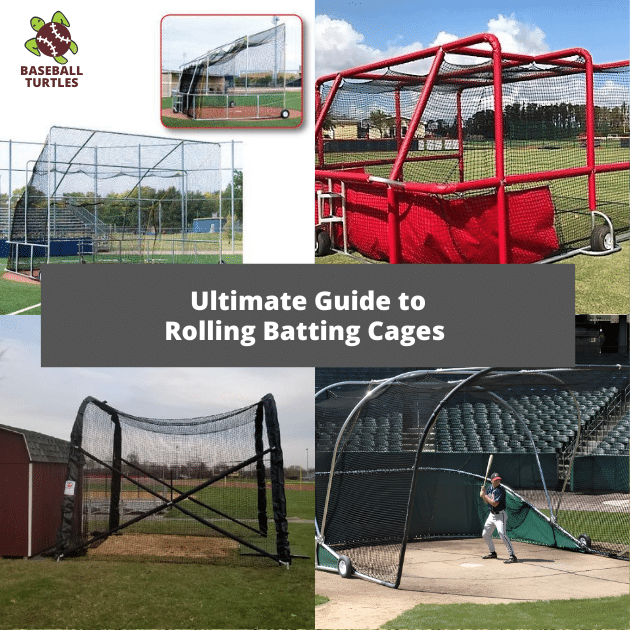
The Complete Breakdown: Choosing and Using a Portable Batting Cage for Serious Training
For baseball and softball athletes, consistent, high-quality repetitions form the foundation of improvement. Because permanent facilities are not always accessible, a portable batting cage serves as an essential training asset. More than a simple net, a well-engineered portable cage functions as a private practice facility, delivering unmatched flexibility for players at every competitive level. This guide covers everything from durable materials and secure assembly to targeted drills and long-term maintenance. Whether you are building a backyard training space, equipping a coaching staff, or refining your swing mechanics, understanding how to select and utilize a portable batting cage will accelerate your development.
Why a Portable Batting Cage Is Essential for Athletes
The primary advantage of a portable batting cage is its mobility, but this feature unlocks extensive training opportunities that fixed structures simply cannot provide.
- Location Independence: Train in your backyard, at a local park, inside a gymnasium, or within a large garage. Eliminating travel time to distant facilities enables spontaneous practice sessions and maximizes available hours.
- Cost-Effectiveness: Compared to the construction expenses of a permanent cage, a high-quality portable model costs a fraction of the price. It represents a single investment that delivers years of reliable use.
- Space Optimization: Most models are engineered for rapid assembly and disassembly. When stored properly, they pack down compactly, preserving valuable yard or facility space for other activities.
- All-Weather Training Potential: Paired with a sturdy frame and quality netting, a portable cage creates a sheltered environment that mitigates light wind and sun exposure. Full weatherproofing requires specific heavy-duty designs.
Performance Impact: Research tracking youth travel baseball teams revealed that players with consistent, accessible home practice facilities increased their batting average by an average of .042 over one season compared to peers who relied exclusively on team practices. This data highlights the measurable value of repetitive, focused swings.
Key Components of a High-Quality Portable Batting Cage
Not all cages deliver equal performance or longevity. Understanding core components ensures you purchase equipment that withstands repeated impact and maintains structural integrity.
Frame Construction
Your cage skeleton must balance durability with manageable weight. Prioritize the following specifications:
- Materials: Powder-coated steel offers the best combination of rust resistance and impact strength. Heavy-duty galvanized steel is another excellent choice. Aluminum reduces overall weight but may lack the rigidity required for larger setups.
- Connection Systems: Pin-and-sleeve or screw-lock mechanisms enable tool-free assembly while maintaining a rigid fit. Avoid frames that depend on friction fits or low-grade plastic joints.
Netting and Safety Standards
The netting acts as your primary safety barrier and impact absorber.
- Knotless vs. Knotted: Knotless netting is strongly recommended. It creates a smoother hitting surface, minimizes ball friction to extend lifespan, and removes hard knots that can deflect pitches or cause hand injuries.
- Mesh Density: Measured by thread ply and hole size, effective baseball and softball cages typically use #21 or #36 twisted polyethylene knotless netting with a 1-3/4-inch mesh. Heavier baseballs demand higher ply ratings to prevent tearing.
- UV Treatment: UV-stabilized netting is non-negotiable. Without it, prolonged sun exposure accelerates fiber degradation, leading to brittleness and premature failure.
Portability Features
Transport and storage capabilities determine how easily you can move your training setup.
- Modular Design: Frames should break into manageable sections for easy loading and unloading.
- Carry Bags: Reinforced bags for both the frame and net protect components during transit and simplify organization.
- Weight Management: Evaluate total system weight relative to your transport method. Adding wheels or a utility cart often pays dividends for larger configurations.
How to Choose the Right Portable Batting Cage
Selecting the ideal cage requires matching specifications to your actual training environment. Use these key considerations to streamline your decision.
- Primary Use Case: Identify the target age group and sport. Match cage dimensions and net ply ratings to typical bat speed and ball velocity.
- Available Space: Measure your intended setup area accurately. Always choose a cage that leaves adequate clearance around the perimeter for safe swings and pitch recovery.
- Frequency of Relocation: Determine how often you will assemble and dismantle the unit. Frequent moves require simplified connection systems and reduced overall weight.
- Budget Allocation: Set a realistic spending range. Never compromise on net quality; a smaller cage with premium netting outperforms a large cage that degrades quickly.
- Accessory Compatibility: Plan for pitching machines or evening sessions. Verify machine-rating labels and consider integrating portable LED lighting for consistent visibility after dark.
Pro Tip: When measuring your space, account for the batter’s swing arc. Right-handed hitters require additional clearance on the left side of the plate. Reserve at least 10 to 12 feet of width beyond the hitting zone to ensure comfortable and safe operation.
Advanced Training Drills Using Your Portable Batting Cage
A portable cage supports structured, purpose-driven workouts rather than generic repetition. Implement these proven drills to maximize development.
1. The Feedback Loop Drill
- Setup: Position a large tarp or canvas target at designated zones inside the cage, such as low-and-away or high-and-inside.
- Goal: Land ten consecutive balls on the target. Immediate visual confirmation and the distinct sound of impact reinforce directional control and muscle memory.
2. Velocity and Reaction Training
- Setup: Program a pitching machine for variable speeds, or have a pitcher throw from behind an L-screen while gradually reducing distance.
- Goal: Develop bat speed and pitch recognition. Begin with controlled speeds to refine mechanics, then introduce randomized fastballs to simulate game-speed decision making.
3. Mental Approach Simulation
- Setup: Call out specific game scenarios before each swing, such as runner on second with no outs requiring a sacrifice bunt.
- Goal: Shift focus from pure mechanics to situational awareness, bridging the gap between isolated cage work and live at-bat execution.
For evening sessions, proper illumination is critical. Pair your cage with high-efficiency portable LED lights to maintain clear pitch tracking and reduce eye strain.
Installation, Maintenance, and Safety Protocols
Proper setup and care extend equipment life and minimize injury risk.
Installation Guidelines
- Always assemble on a flat, debris-free surface. Clear rocks, twigs, and uneven ground before beginning.
- Construct the frame first, verifying that every joint is fully seated and locked into place.
- Drape the net over the top-center support, then pull outward evenly to maintain tension.
- Attach the net using provided ties, bungees, or clips, eliminating excessive sagging that could compromise containment.
Maintenance Best Practices
- Regular Inspection: Examine frame joints and net threads for wear or fraying before every session.
- Cleaning: Rinse netting with a gentle water stream to remove dirt and pollen. Avoid harsh detergents that degrade fibers.
- Storage: Store all components completely dry in a cool, shaded location. Moisture accelerates metal corrosion and weakens synthetic netting.
Safety Essentials
- Never swing a bat outside the protected zone when individuals are nearby.
- Anchoring is mandatory. Secure the frame to the ground using stakes for grass or dirt, and weighted bases for concrete or asphalt surfaces.
- Always deploy a protective L-screen when a live pitcher is throwing to safeguard against foul balls and errant pitches.